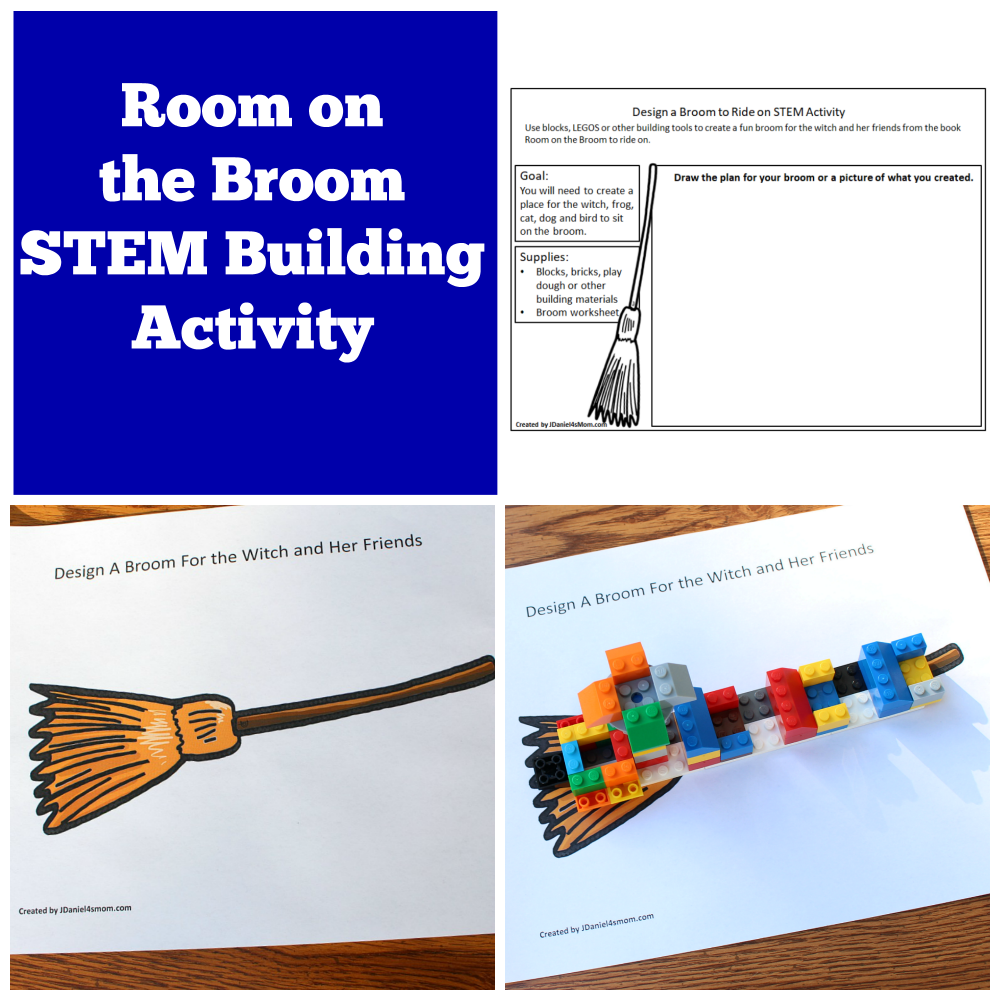
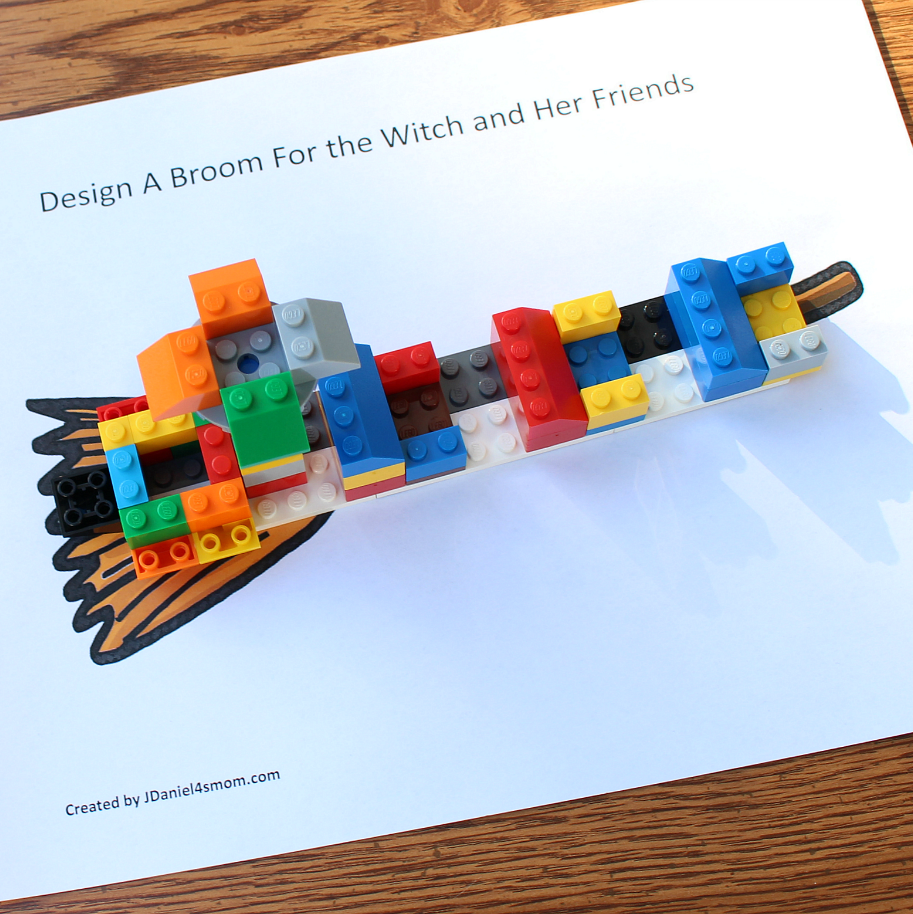
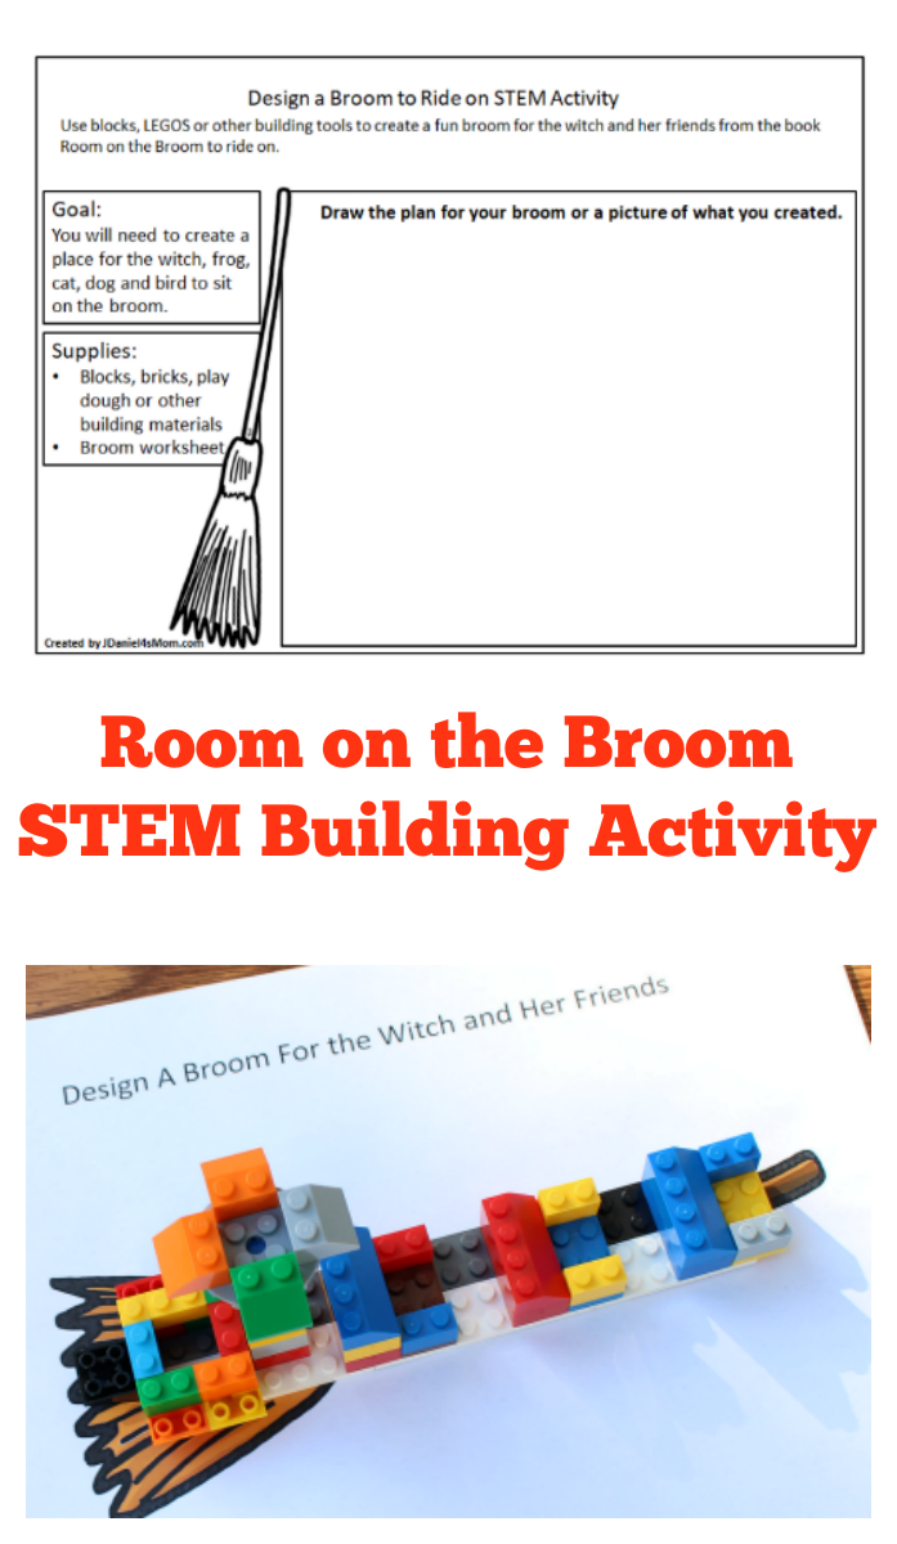
Earlier this week I shared a sensory activity based on the book Room on a Broom. We had such fun making bubbles rise out of the dish soap brew to make creations based on activities found on our set exploration cards. Today I have another fun activity for your children. This activity invites children to create room on the broom for the witch and her friends to sit.
Getting Ready for the Room on the Broom Activity
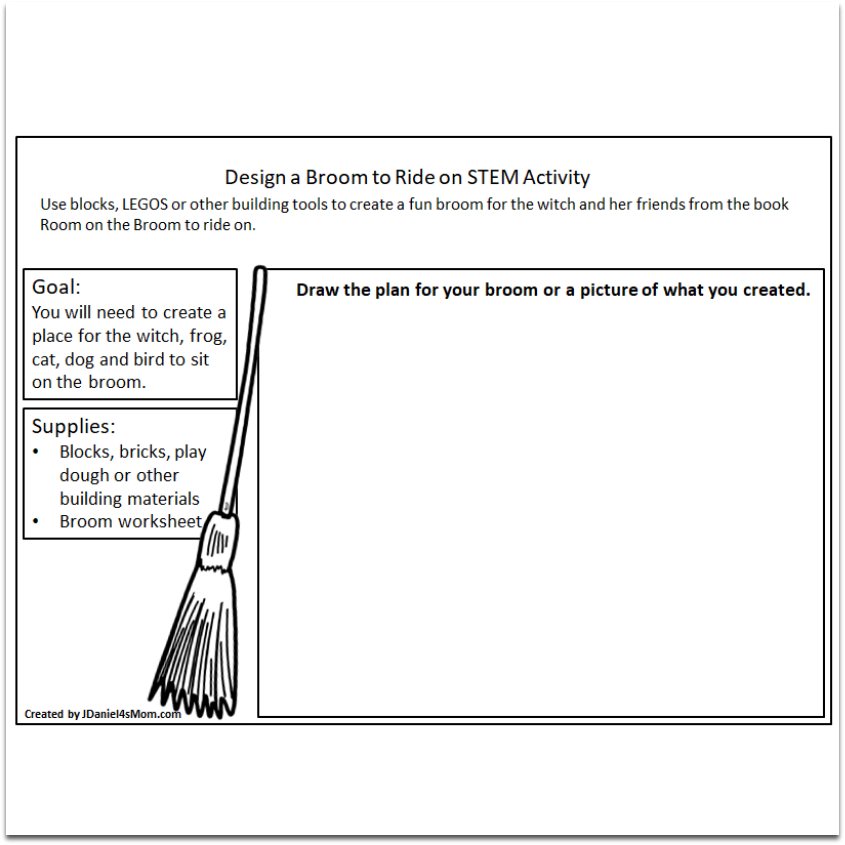
You will need to print out a copy of the Design a Broom to Ride on STEM Activity. Each of your children will need a planning printable and a broom building mat.
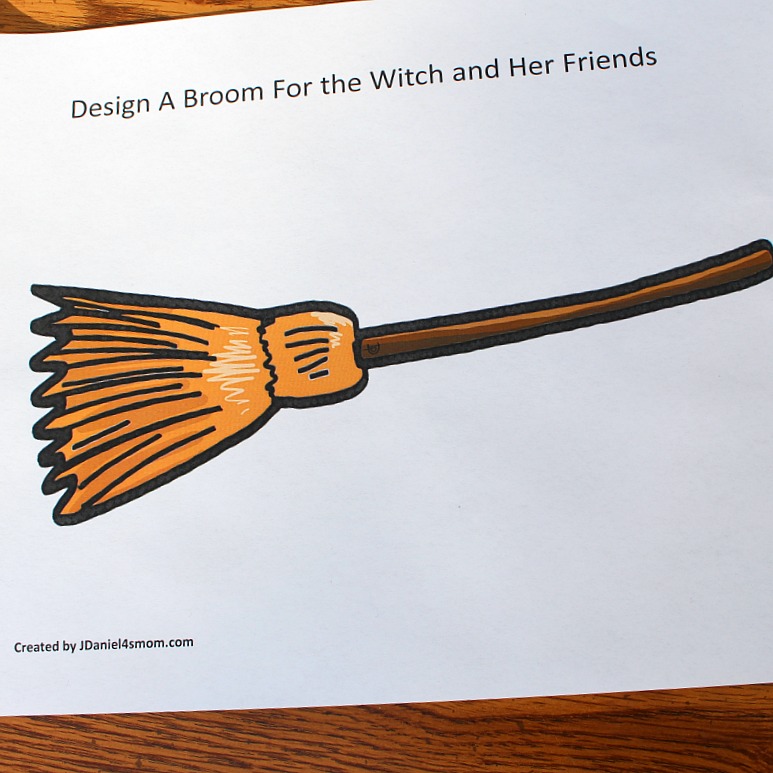
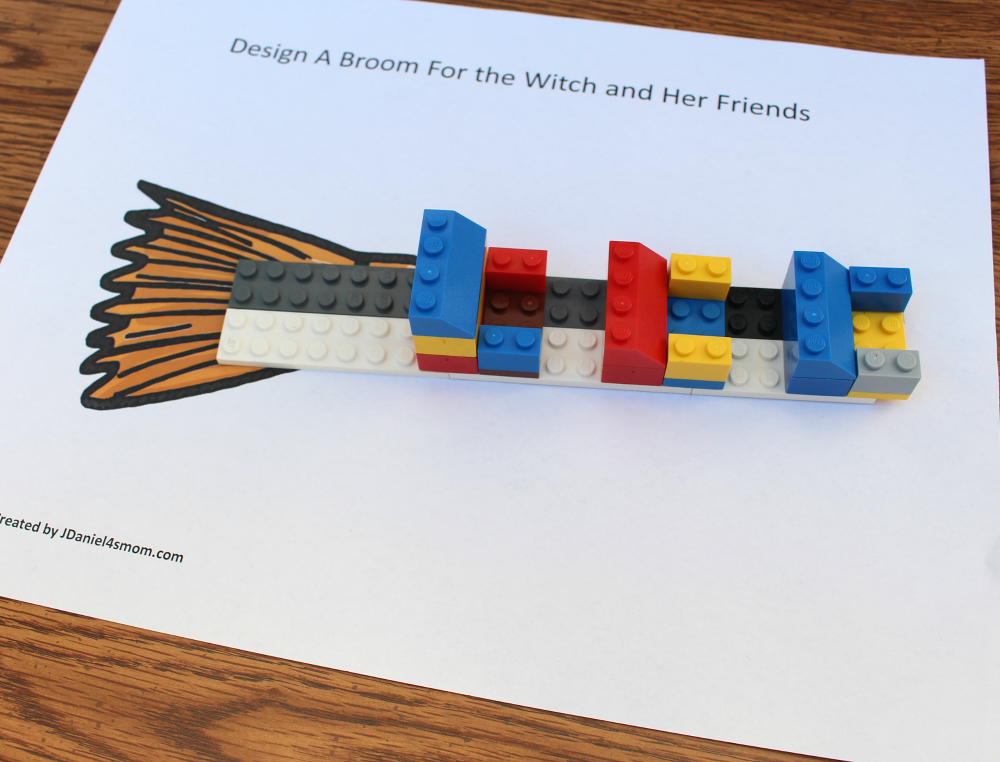
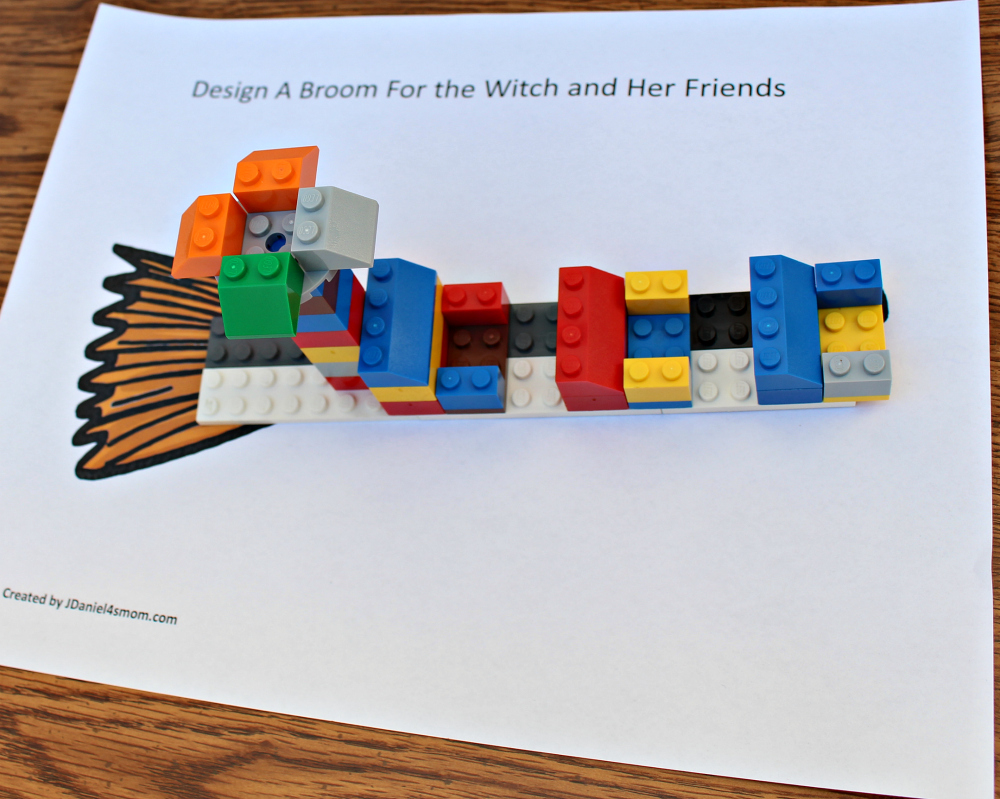
You can decide if you want to put out a variety of building materials for your children to use or just one type. The creation you will see below features LEGO, but you can use any of the building materials below or one of your own selection.
Building Materials
Lego
Play Dough
Blocks
Odd and Ends (Sticks, Straws, Yarn, Clay, Etc…)
Bristle Blocks
Pattern Blocks
Getting Started with the Room on the Broom Activity
You will want to read the book Room on a Broom to your students. It will give them the opportunity to see the broom the witch and her friends traveled on. It will also give them the opportunity to meet the passengers they will be building the broom for.
Then you will need to decide if you want your children plan what they are going to build on the planning printable or draw a diagram of their creation on it when it is completed.
Once you have decided what you want to have the do first, you can pass out the broom building mat. It will be so much fun to see what they come up with. Please remind them that their creation doesn’t have to look anything like the one in the book.
Wonderful Halloween Books
The links below are affiliate links.
Fun Halloween Books
Links below are affiliate links.
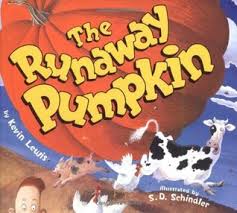
The Runaway Pumpkin– When a pumpkin breaks from its vine, it rolls through a farm encountering many of the farm’s animals. This book is written in rhyme. The rhyme seems to speed up as the pumpkin does.
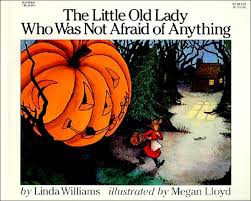
The Little Old Lady Who Was Not Afraid of Anything– Despite having many things chasing her a little old lady on a walk remains fearless. Children will love the unique things that chase her and how she deals with them.
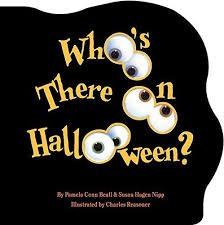
Who’s There on Halloween?– Children will love following the rhyming text to find out just who is there on Halloween. I think parents reading this book to their children will too.
If you like this STEM project, here are some other projects your children will like.
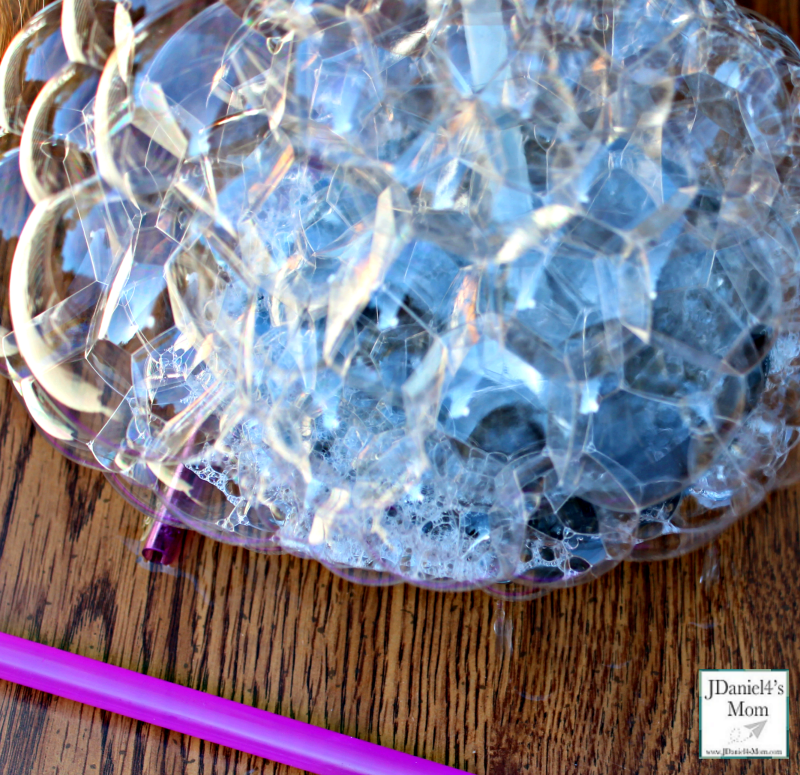
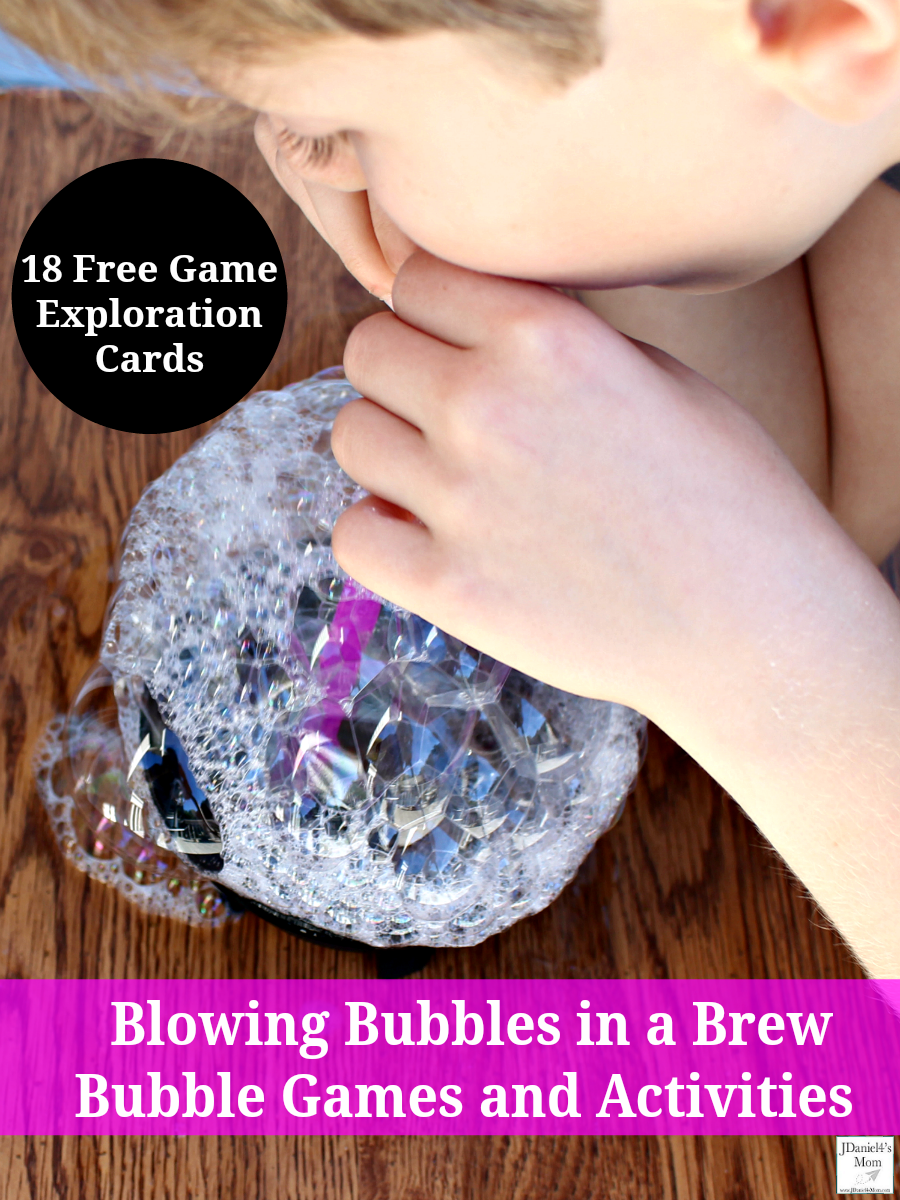
The witch in the story Room on the Broom created a wonderful new broom out with a mixture of things added to her cauldron. Your children will have fun creating bubble creations and playing bubble games using a free set of creation cards, water, soap bubble, and straws.
Your children can use the free printable cards to explore preposition, breathe control and challenge other children’s bubble blowing skills. All of the bubble games and activities can be done by both children young and old. Younger children will need you to read the words on the to them.
Bubble Games and Activities
Getting Ready
Before you start playing the bubble games and exploring the bubble activities, you will need to download a copy of the cards set. The Bubble Games and Activities Exploration Cards for Kids have a blue border. They could be printed in black and white, but look nice in color.
Supplies
Variety of Types of Straws
Dish Soap
Water
Plastic Container (We used one that looks like a cauldron.)
Bubble Games and Activities
Each of your children will need to have their own container filled half up with water and a few drops of dish soap. You can give them just one straw or several straws.
Each child will take an exploration card of the stack. Then they will need to do what it asks them too. If they playing the games with other people, they can challenge someone else to do the exploration with them. You will notice that some of the cards have explorations designed for two people. Feel free to join your child in those activities if another child isn’t available.
Before moving onto the next card, they will need to let the bubbles settle back into their containers.
If you like this sensory activity, here are several more your children will enjoy:
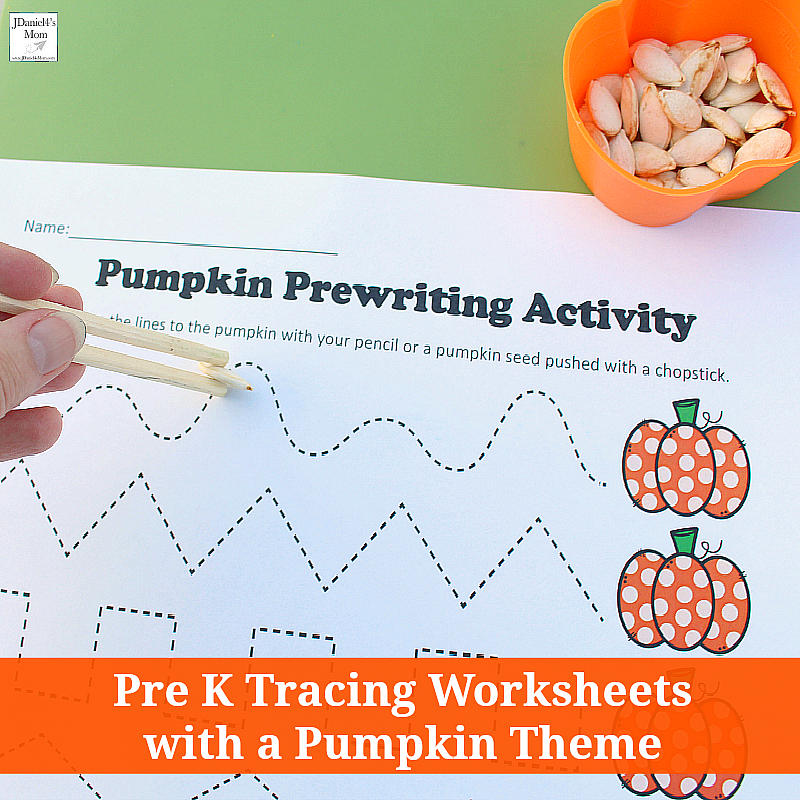
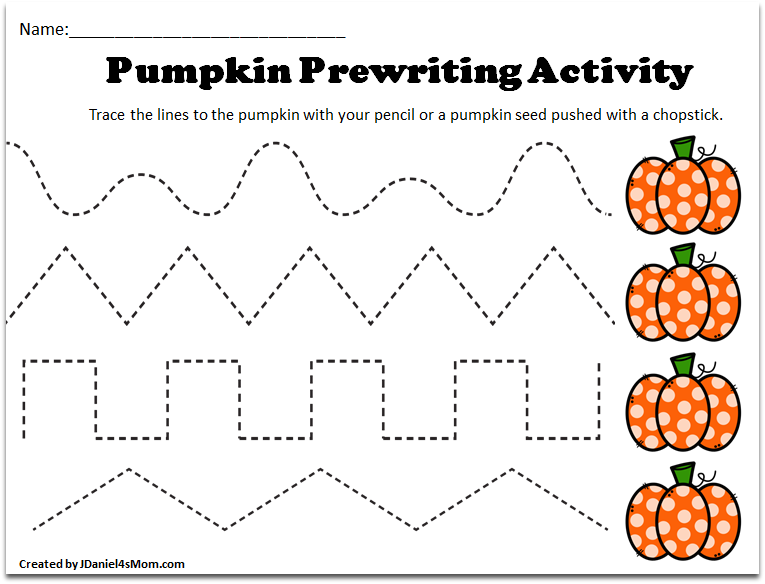
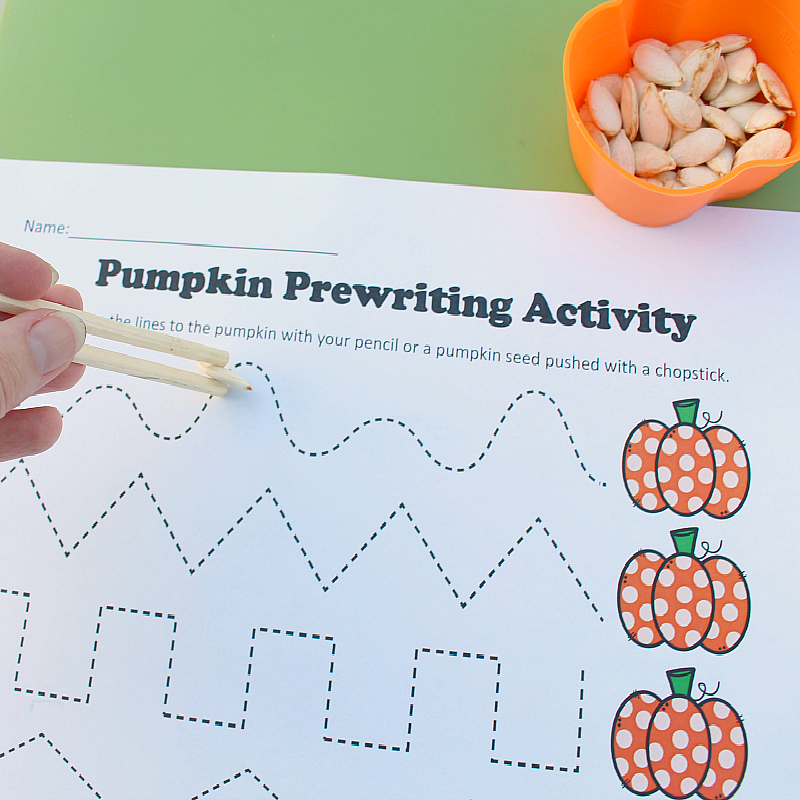
Prewriting activities like the ones your children can do with this set of pre K tracing worksheets are a great way to work on fine motor skills. Whether you choose to have your children use a pencil to trace the lines or a pumpkin seed and chopsticks, they are sure to have fun. We concentrated on using a chopstick and a pumpkin seed. Your children are going to have fun trying each of the ways we came up with.
Getting the Pre K Tracing Worksheets
You can click right on the words Pumpkin Prewriting Activity to download the complete set of pre K tracing worksheets. You will find that there are six printable in the set.
Getting the Chopsticks Ready
You will need to wrap a rubber band around the top of a set of chopsticks. Then push a pom-pom up between the chopsticks. Having the pom-pom between the chopsticks will cause them to spring open when your children release the pincher grip on the chopsticks.
Using the Pre K Tracing Worksheets
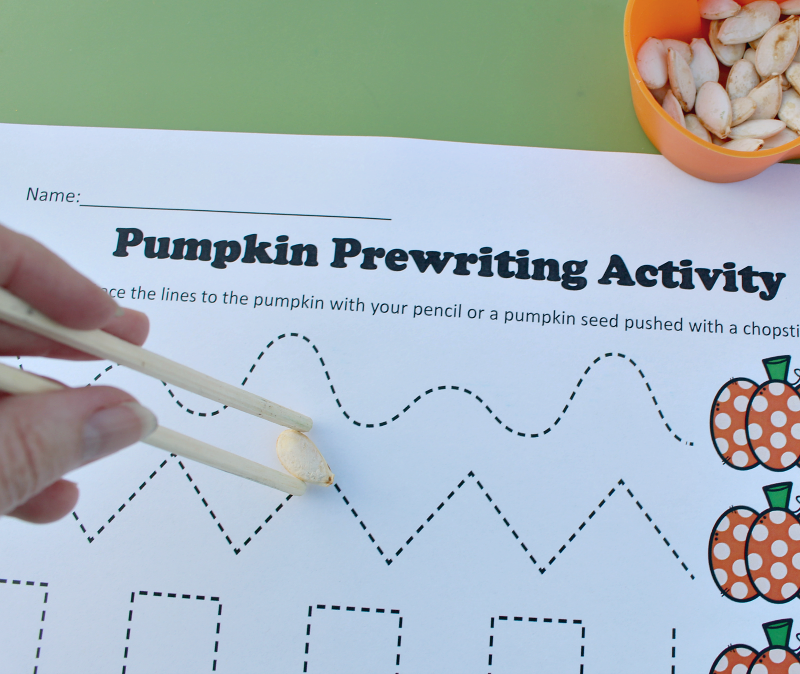
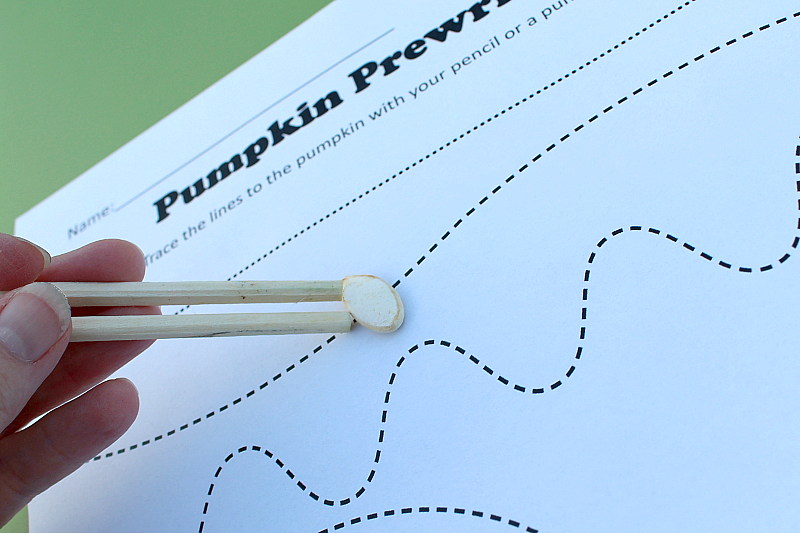
You could just have your children trace over the lines on the pre K tracing worksheets with a pencil. I think your children will have more fun using a set of chopsticks and a pumpkin seed. The hold your children will place on the chopsticks is the same pincer grip your children use with a pencil.
Activity One
Have your children place the pumpkin seed in the chopsticks vertically. The pumpkin seed will look like the tip of a pencil. Then have them move the seed along each line until they have reached the pumpkin.
Activity Two
This time your children will place the pumpkin seed in the chopstick horizontally. This will make the gap between the chopsticks a little wider. Then they will once again move the seed along each line to the pumpkin.
Activity Three
The pumpkin seed isn’t in the chopsticks for this activity. Your children will push the pumpkin seed along with lines with the chopstick. This activity requires the most focus.
The link below is an affiliate link.
This activity was designed to go along with the Virtual Book Club Book of the Week Five Little Pumpkins. Below you will find more Five Little Pumpkin activities created by other Virtual Book Club Members.
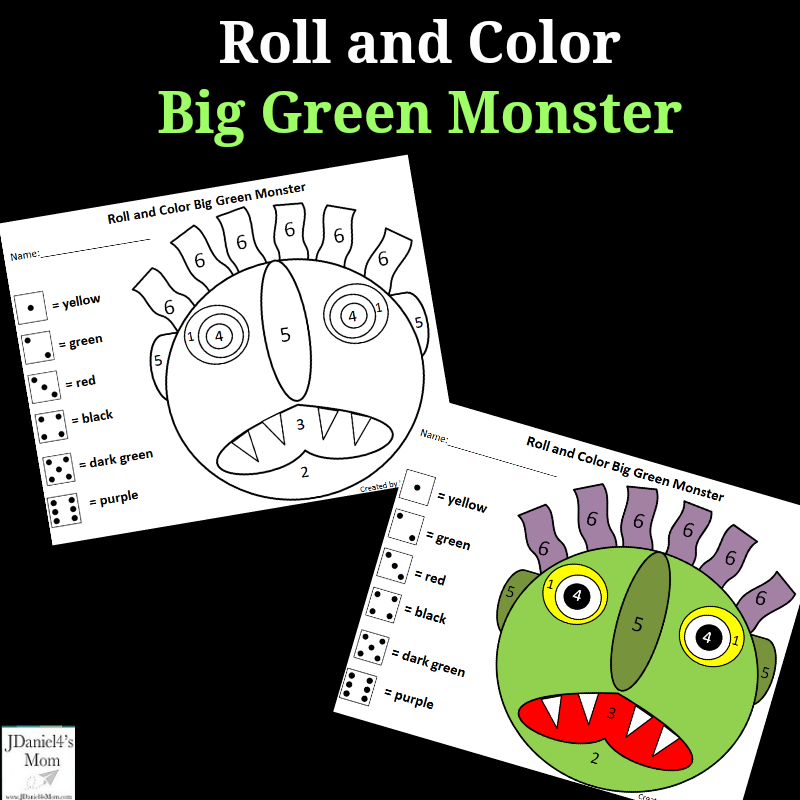
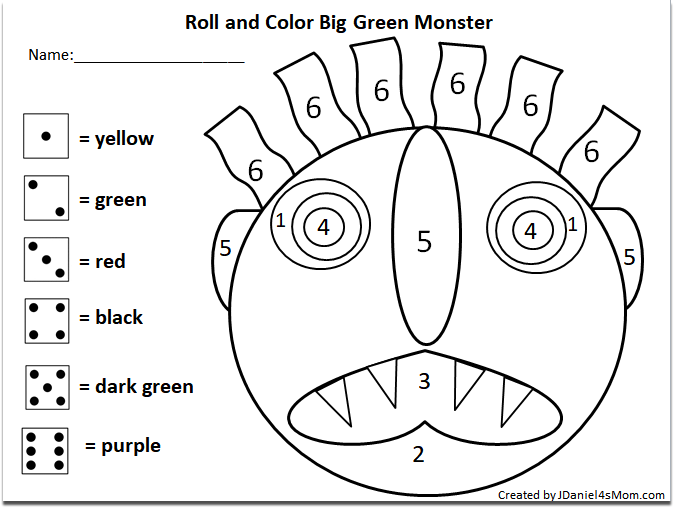
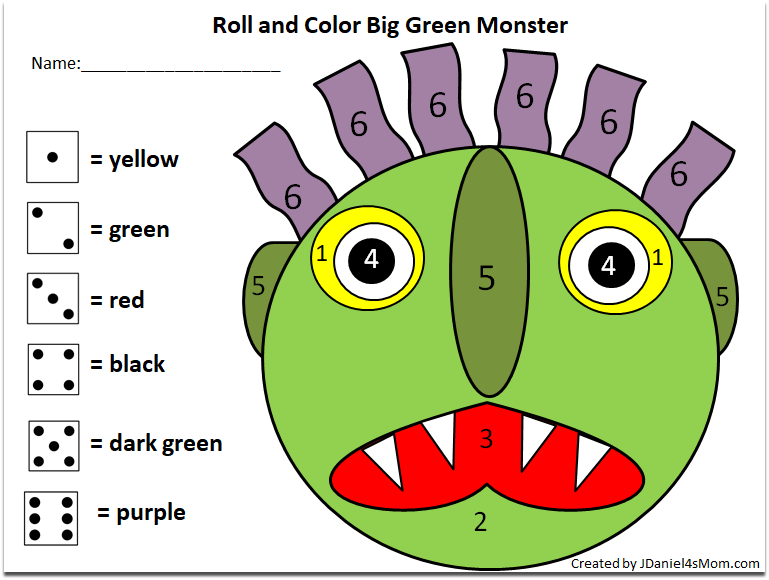
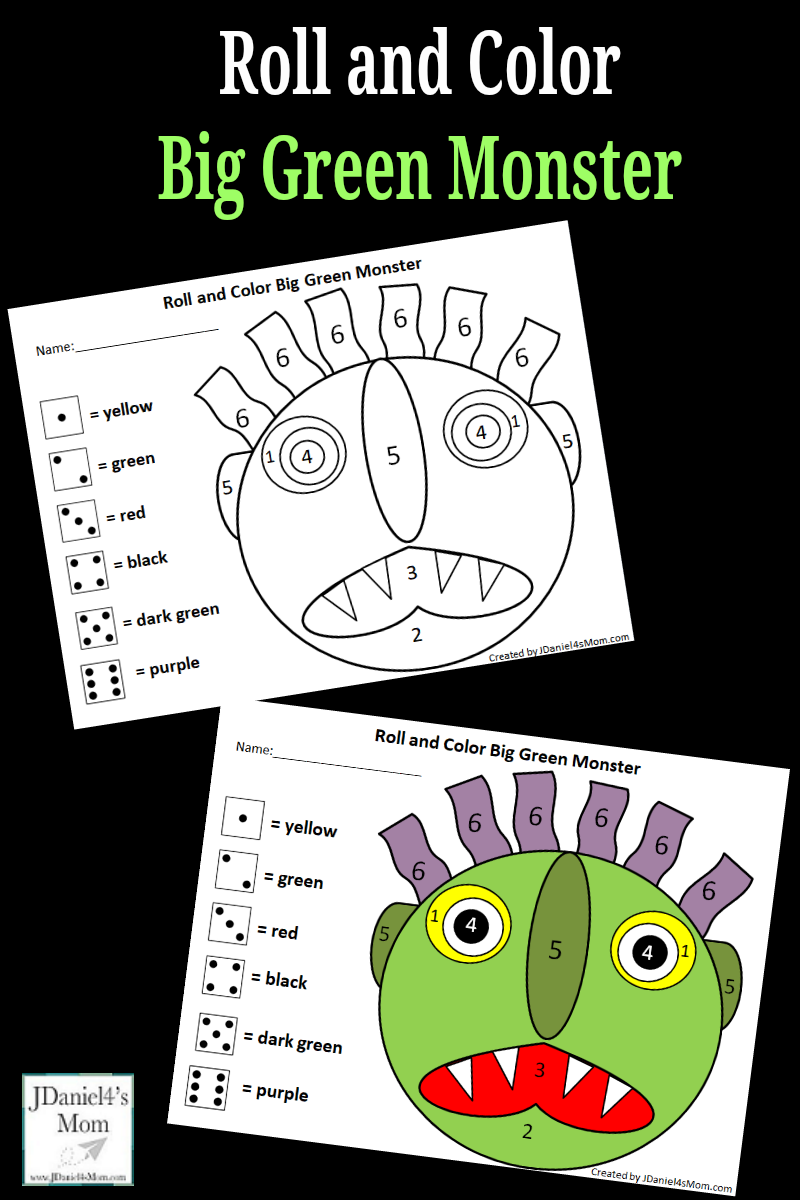
This week I am sharing monster-themed activities that go along with the book Go Away, Big Green Monster. The monster on this printable was created to look like the monster in the book. He is not a perfect match. I created him using shapes available in Publisher. I hope your children will think it looks close to the monster in the book.
Big Green Monster Math Activity
Links below are affiliate links.
Getting Ready for the Activity
You can get a copy of the Roll and Color Green Monster Math math activity by clicking on the underlined words to the left. The printable was created to be printed out in black and white. You will not need to send it to a color printer.
Each of your children will need a red, yellow, black, purple, dark green and green crayon. If you have Crayola crayons for each student that would be perfect. They will also need a six-sided die.
If you haven’t read the story Go Away, Big Green Monster!, you will want to read it to your children before starting the activity.
How to Complete the Big Green Monster Math Activity
Your children will need to place their name on the top of the paper. Then they will roll their die. They will next need to identify the number on the dice. If they need to, they can count the dots on the dice.
The next step is to figure out what color goes with that number. They will find a color key on the printable.
Then they will look for all the sections of the monster that have that number in them. Children will need to color in all of the sections the color that matches that number. The areas of the monster that do not have numbers in them will need to stay white.
They will repeat the process until all of the numbered sections are colored in.
Finally, they will look at the cover of the book to see if their colors match.
If you like this printable, here are some more math printables you will want to explore:
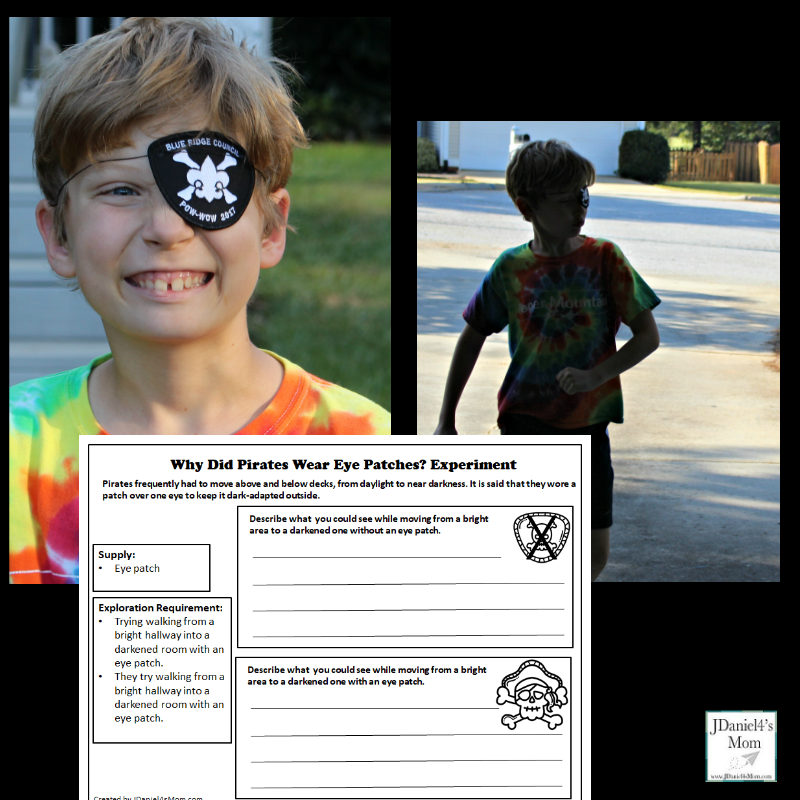
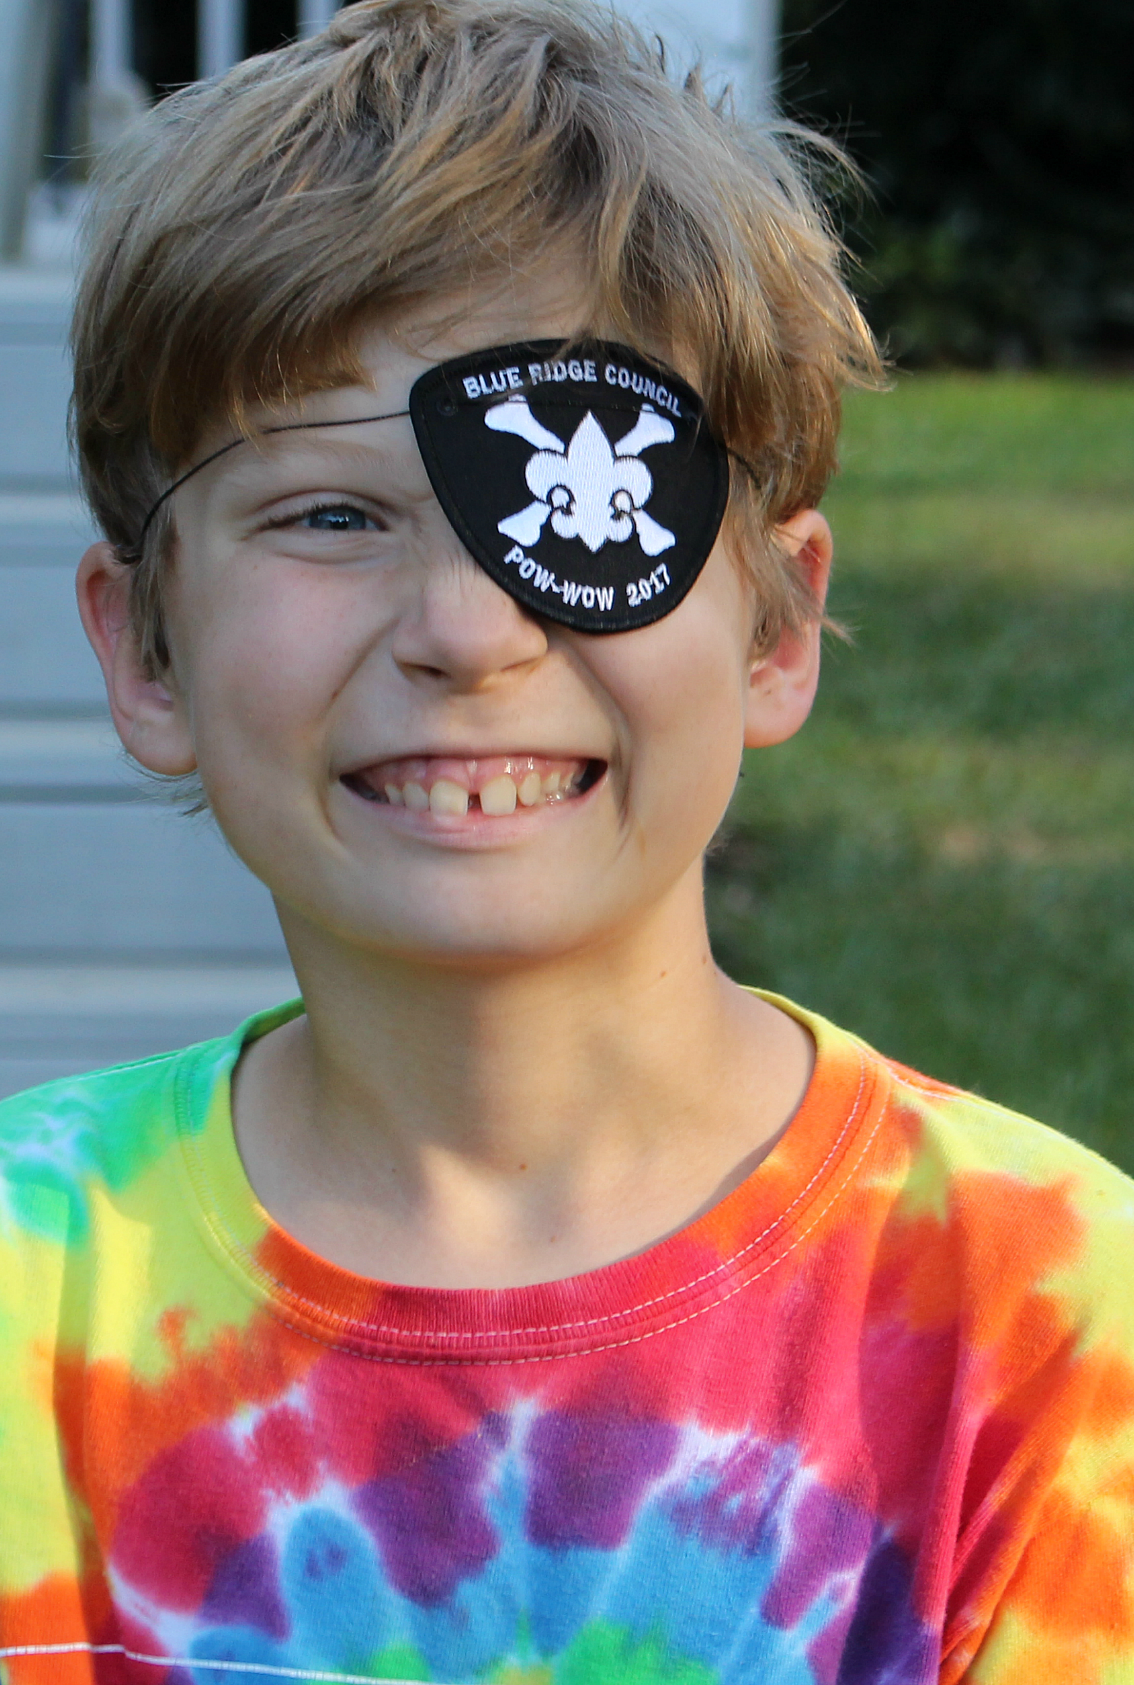
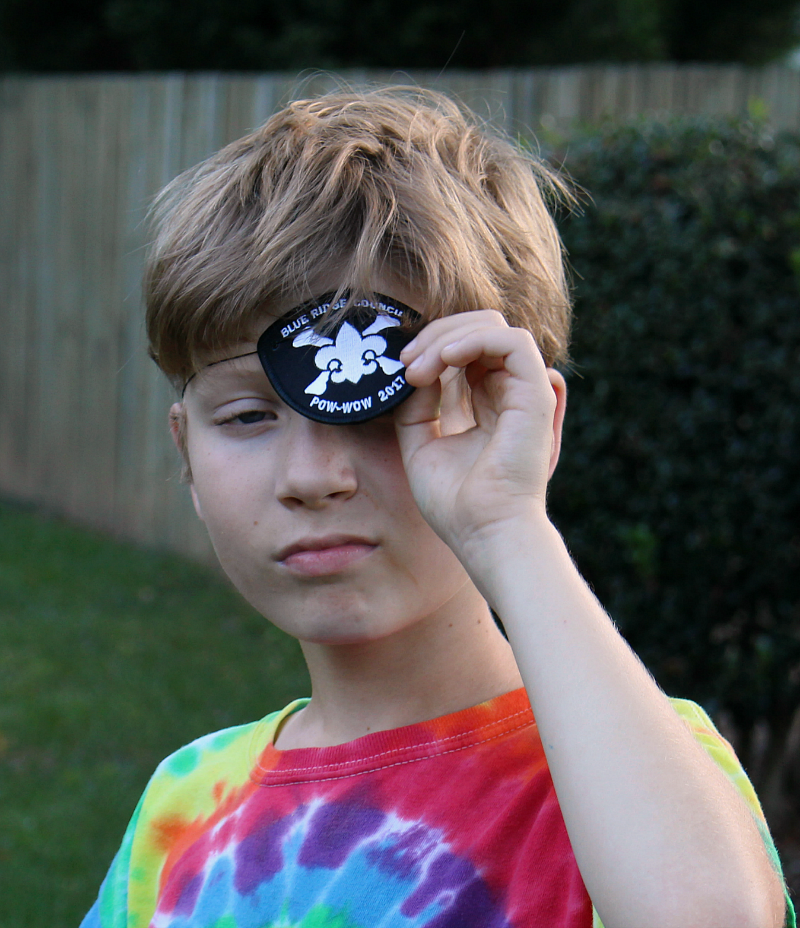
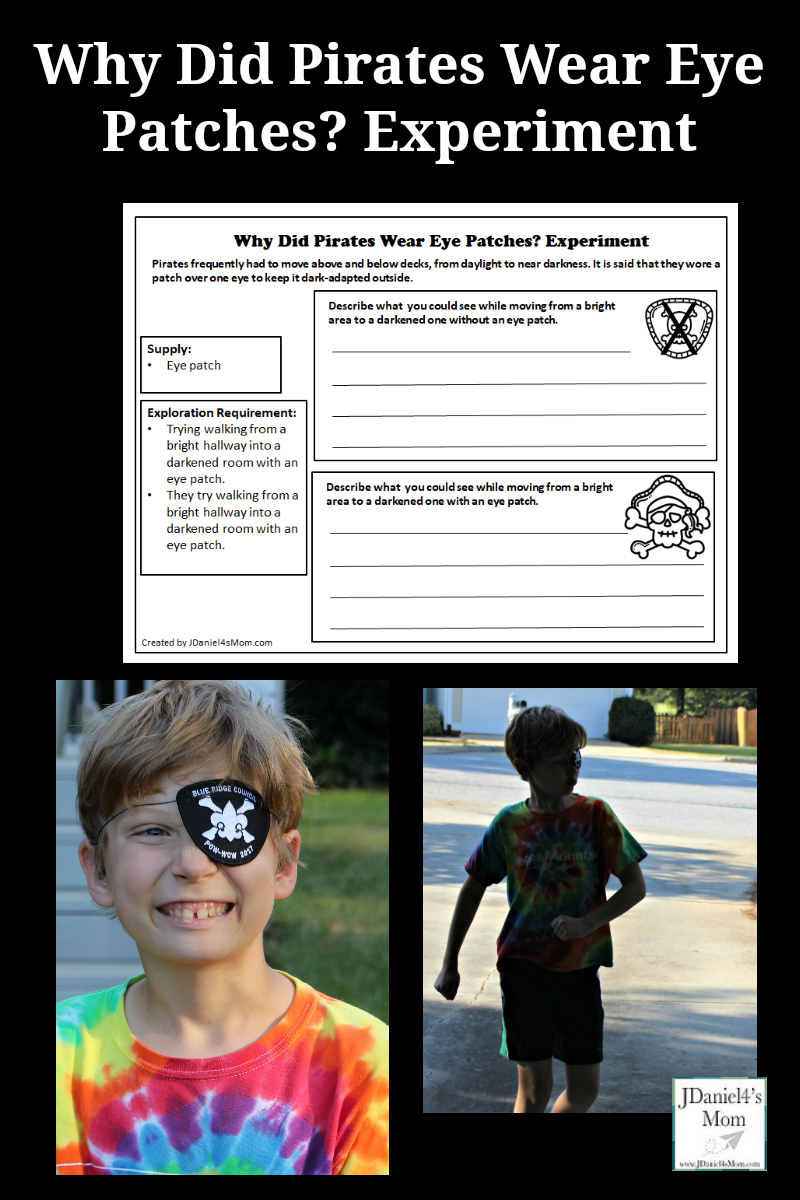
JDaniel discussed Why Did Pirates Wear Eye Patches? with one of his teachers a few years ago on Talk Like a Pirate Day. She told him that pirates frequently had to move above and below decks, from daylight to near darkness. It was said that they wore a patch over one eye to keep it dark-adapted outside. On this final day of 5 Days of Pirate printables, I thought it would be fun to do a STEM experiment to see if wearing an eye patch while playing made it easier to see when you moved into a darkened area.
Why Did Pirates Wear Eye Patches? Experiment
While you could conduct this experiment without a recording printable, I have created a Why Did Pirates Wear Eye Patches Experiment printable. Your children can record their insights from the experiment on this document.
Getting Started
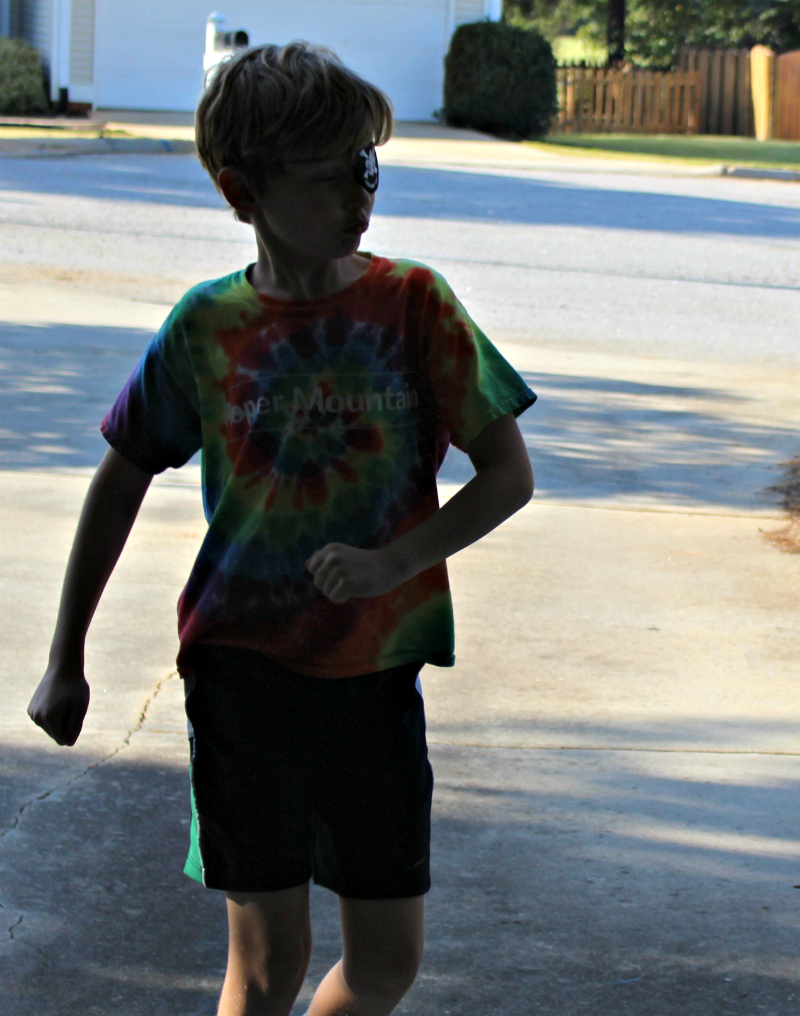
Your children will need to wear an eye patch in a brightly lit room or outside for a short time. We wore ours for about 15 or 20 minutes.
One Eye is Ready for Darkness
As they move into a darkened room or darker space, they can slowly lift up the eye patch as they go into the darkened space. They will have one eye that is dark adapted and one that will need to adjust the darkness.
Next, have your children describe orally or record on the printable what they could see as they walked into the darkened area.
Switching the Patch
The part of the Why Did Pirates Wear Eye Patches? experiment has children move the eye patch from one eye to the other. As your children move from a bright area to a darkened one they will switch the eye that is covered with the eye patch. The once covered eye should be able to see better in the darkness. Afer all it is dark-adapted.
Next, have your children share orally with your or write down what they could see with the eye patch on.
Creating a Conclusion
You will want to take time to have your children share with you their experience with the eye patch. It will be fun to see if they felt that it helped to move the eye patch from one eye to the other. Finding out what they saw as they moved into the darkness will be fun too. Not every pirate may have focused on the same things.
Here are the other pirate printables that were shared this week:
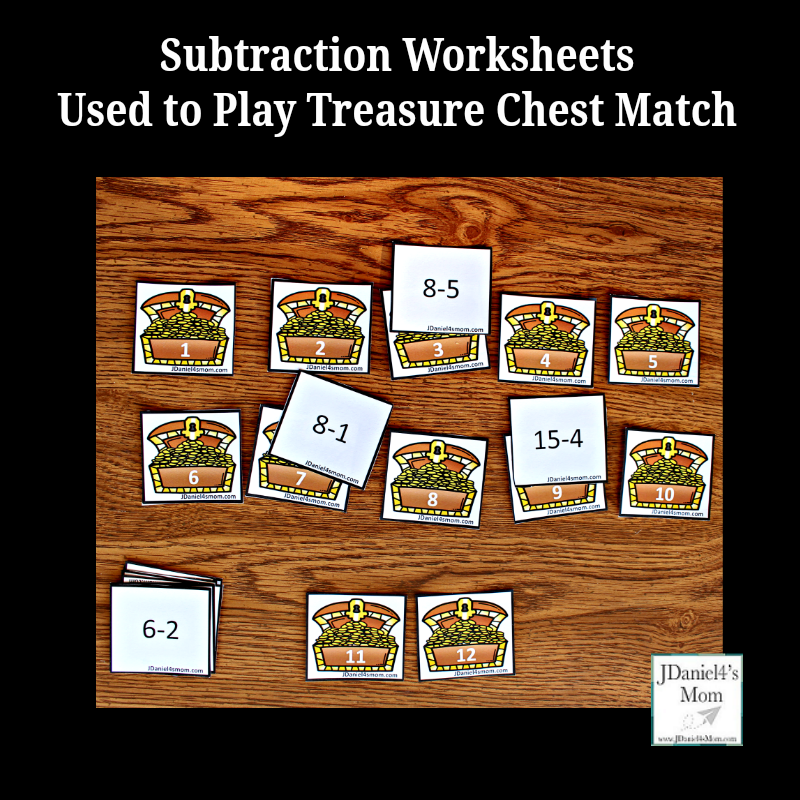
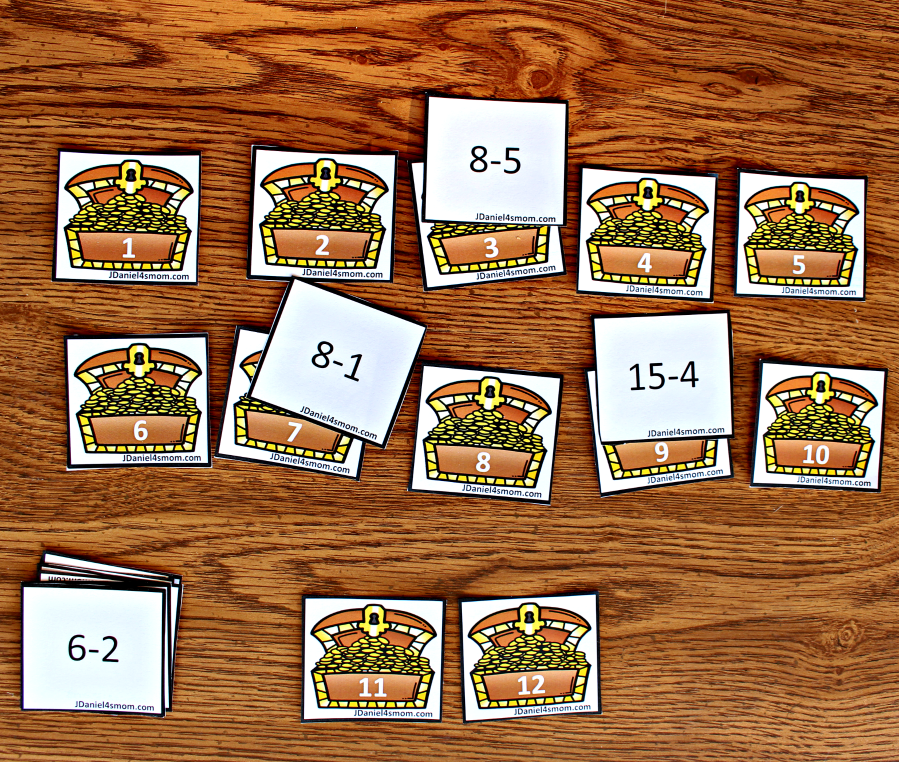
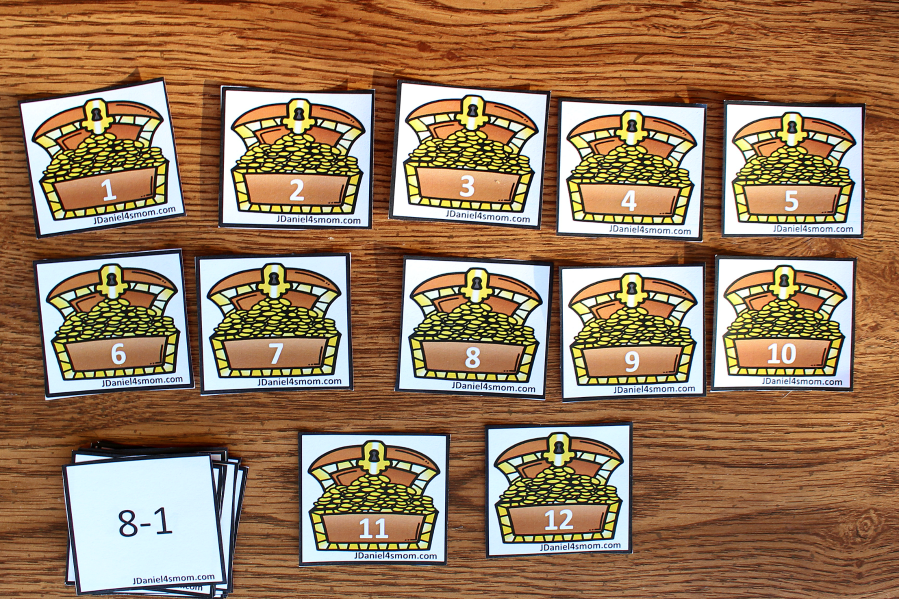
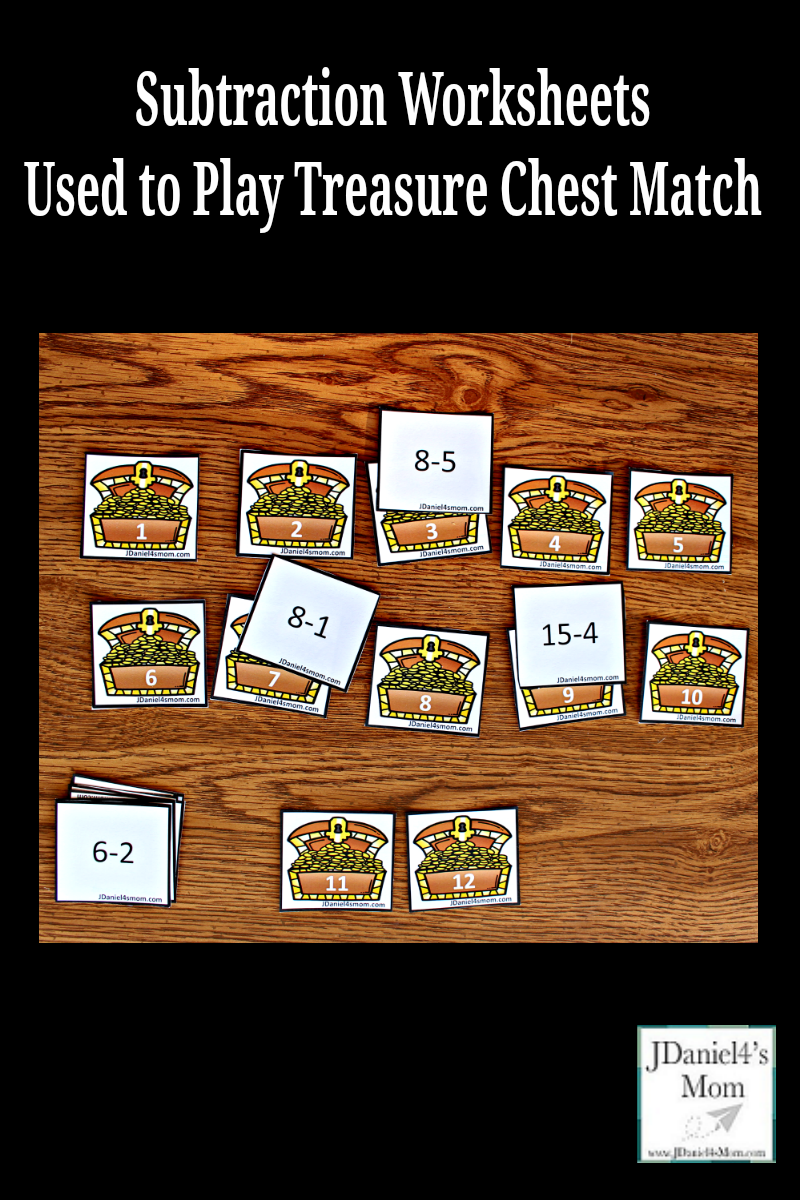
This is day four of the Pirate Printables. I have been sharing a new set of printables every day this week. Today’s set of subtraction worksheets can be used play Treasure Chest Match.
There are two different versions of treasure chest match. Let me share them with you.
Getting the Subtraction Worksheets
If you click onTreasure Chest Match Up, you can download your free copy of the subtraction worksheets need to play treasure chest match up. Once you have printed out the subtraction worksheets. You can cut out the subtraction flashcards and the treasure chest number cards.
Playing Treasure Chest Match
Equation to Answer
You can have your children layout all of the treasure chests in rows on a table or the floor and place the subtraction flashcards in a pile. Next, they will take one subtraction flash card from the pile at a time. Then, they will look at the treasure chest number cards on the table to find the answer for that subtraction fact. Finally, they will place the subtraction fact on the treasure chest card with the answer.
As the play this game, there will be fewer and fewer treasure chest that don’t have subtraction fact match on them. This will make easier for your children to find the final matches.
Memory
Your children will take all of the number cards and all of the subtraction cards and place them upside down on a table or the floor. Then they will turn over two cards at the time. Children are looking for a subtraction card and a treasure chest card with the number that answers that number fact on the subtraction card. If they get a match, they can pick up those cards and put them in a pile. The game is over when they have found all of the matches.
Here are the other pirate printables I have shared this week:
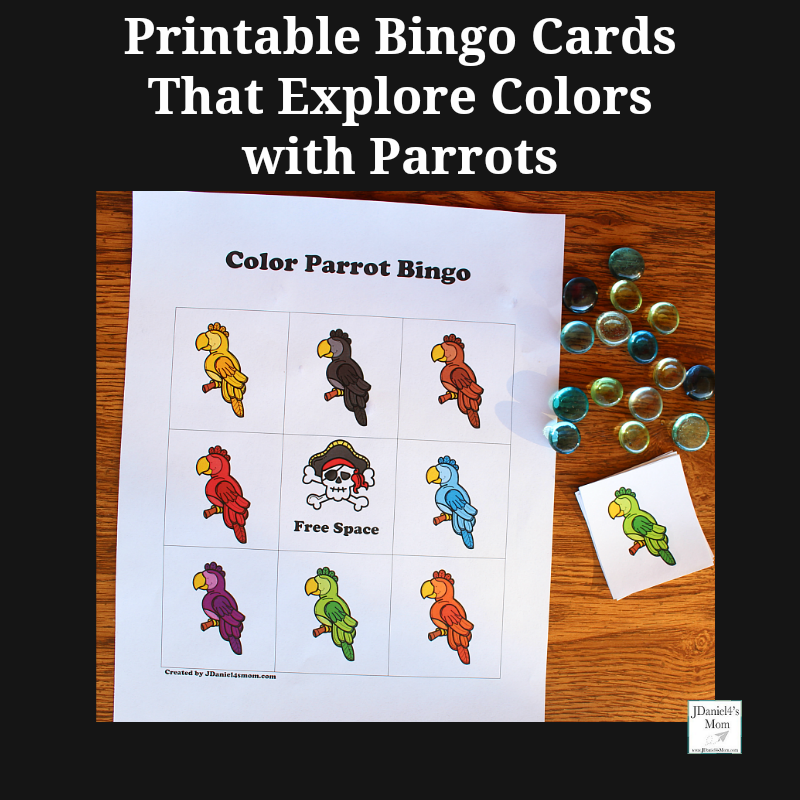
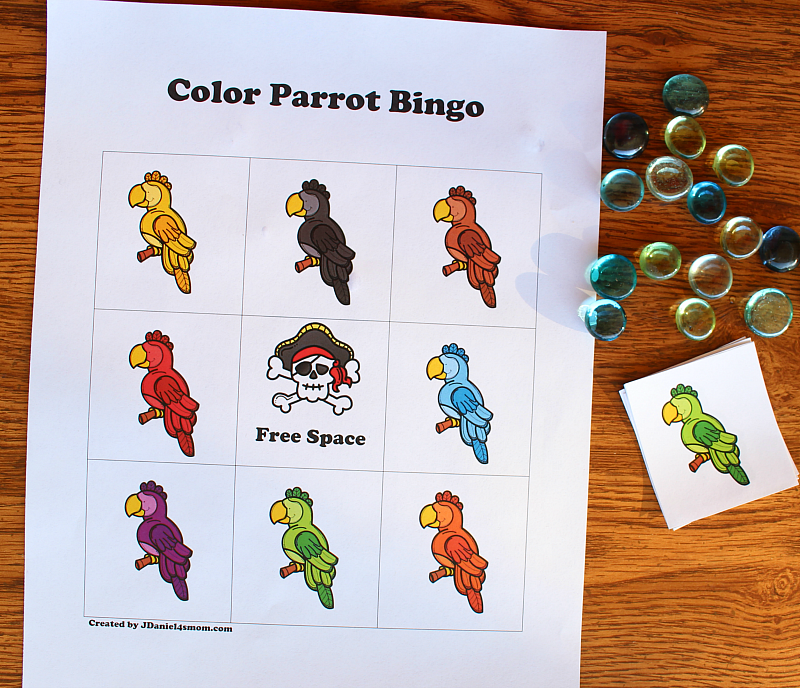
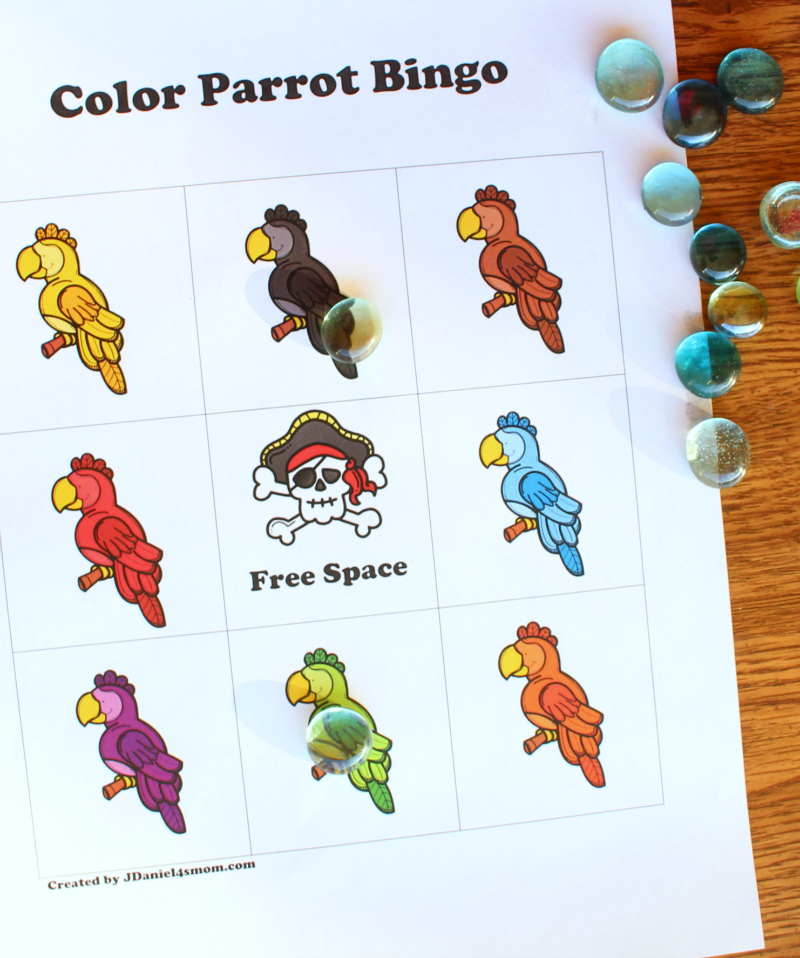
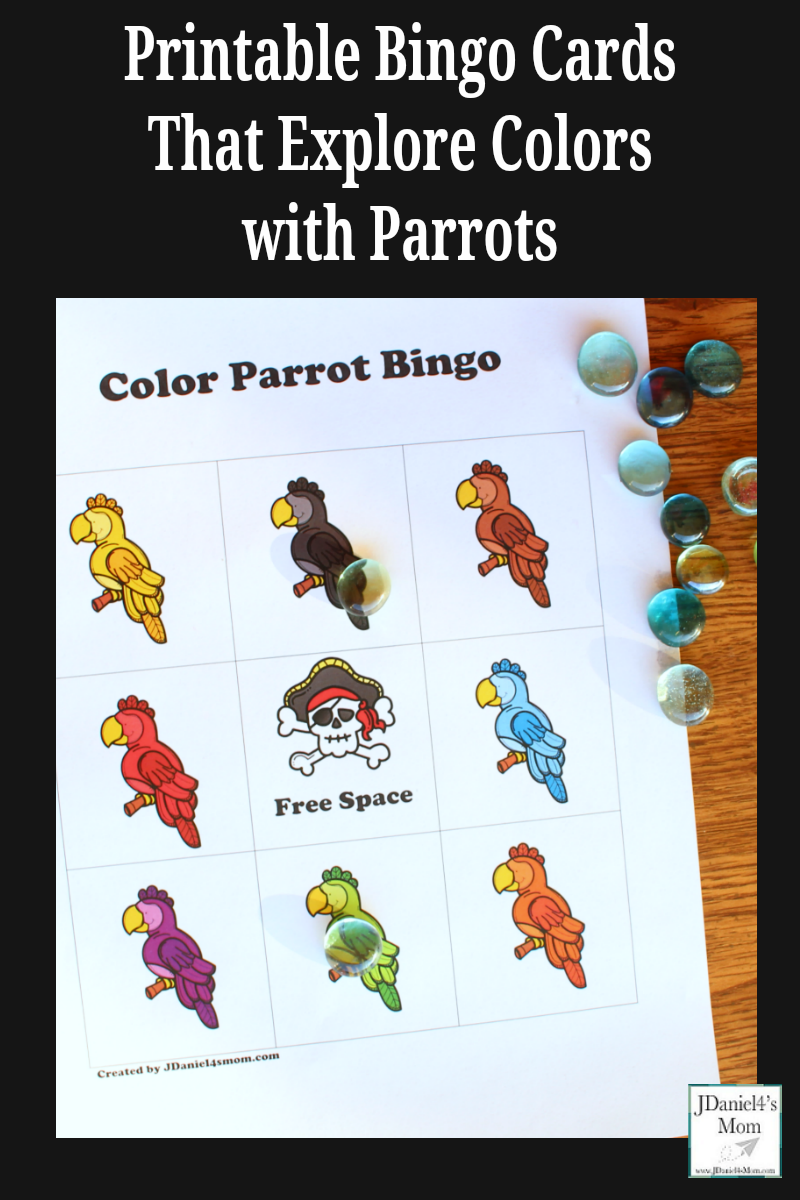
It is day three of Pirate Printable Week! Today I have a set of printable bingo cards that explore colors. Each of the printable bingo cards for kids displays eight parrots. Each one features a single color. These would be a great part of a pirate unit or after reading a fun pirate themed book. (You will find a list of fun pirate books for kids a the end of this post.)
Printable Bingo Cards for Kids with Parrots
Before you get started you will need to download and print the Printable Bingo Cards that Explore Color with Parrots. The parrots and the skull in the free space are all colored clip art as well as the parrot color cards.You will need to print out the cards on a color printer.
You can give a pile of the parrot color cards and a bingo card to your child. They can take one color card of the pile at a time. After they say the name of the color, they can place on bingo marker on the parrot that is the same color on the card. When they have three markers in a row or column, they can say BINGO or ARRR!
Multiplayer Bingo
You will need to give each of your children one of the printable bingo cards and some bingo markers. Then your children can take turns picking up a card from the stack and calling out the color of the parrot on the card. Anyone with that colored parrot will cover it with a bingo marker. When one of the children has three markers in a row or column, they can say BINGO or ARRR!
Pirate Themed Books for Kids
I love tying activities I create for kids to children’s books with a similar theme. Two of my favorite pirate books areHow I Became a Pirate and Pirate Nap: A Book of Colors. They both have fun illustrations and are great fun to read aloud. I bet your children will love them.
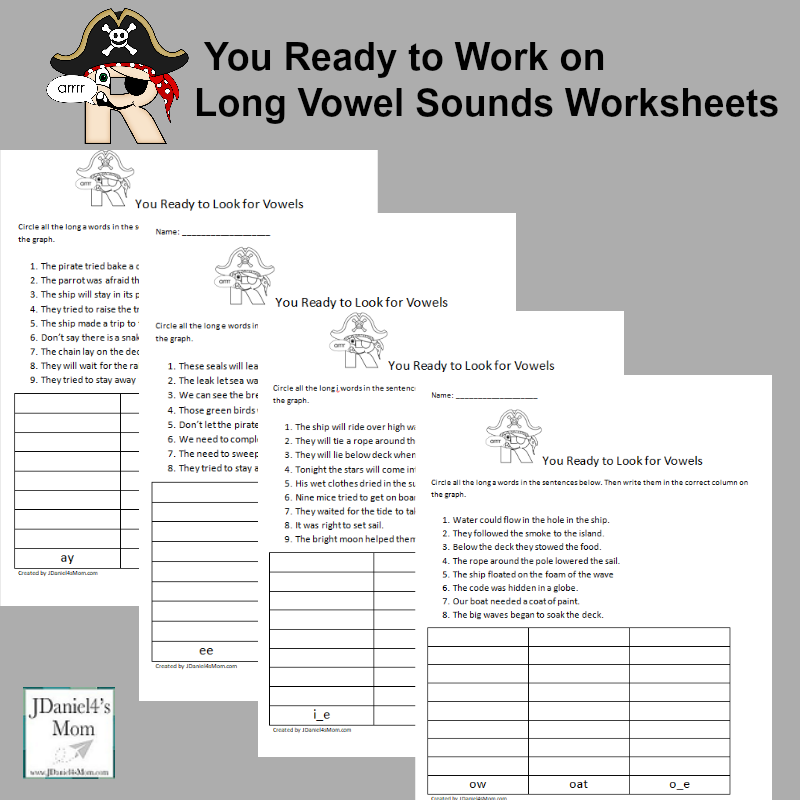
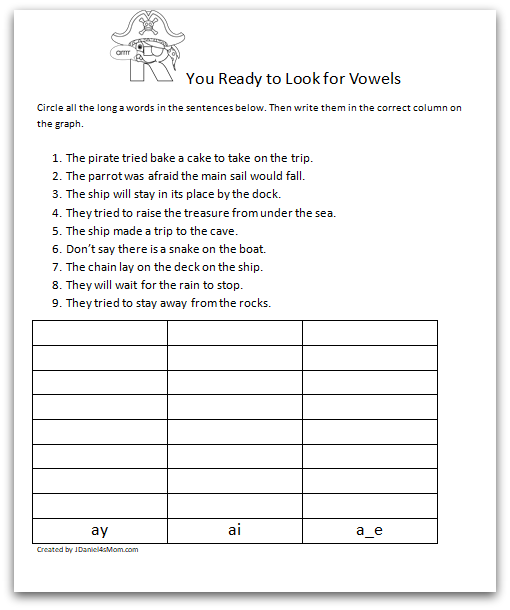
Welcome to Day 2 of Pirate Printables! Yesterday I shared a set of r controlled vowel printable activities. Today I have a set of four long vowel sound pages. Each of the pages invites children to circle the words with a certain long vowel sound. Then they have to graph the words with each letter combination.
Long Vowel Sounds Worksheets
This set of long vowel sounds worksheets features words with the long a, e, i and o. Later in the week, I will share a long u activity.
Getting Started
Before your children get started with the Long Vowel Pirate Pages, you will need to print them out.
Exploring the Long Vowel Worksheet
Your children will be asked to circle on the words with the long vowel sound featured on that worksheet. If you want them to, they can circle them with a gold crayon or colored pencil. The yellow circles will look like gold coins. Most of the sentences have two or three words for your children to circle.
Next, they will write the words they circle in the table above the vowel combination featured in each column. Your children will find more of some combinations than others in the sentences.
Finally, you can ask them which letter combination or combinations ended up with the most words. If you want them to fill each column all the way to the top.
If you want them to fill each column all the way to the top. You can have them come up with their own words that fit each vowel combination. They can write their words in the empty boxes or cells in each column.
If you like this reading activity, here are some more you will like:
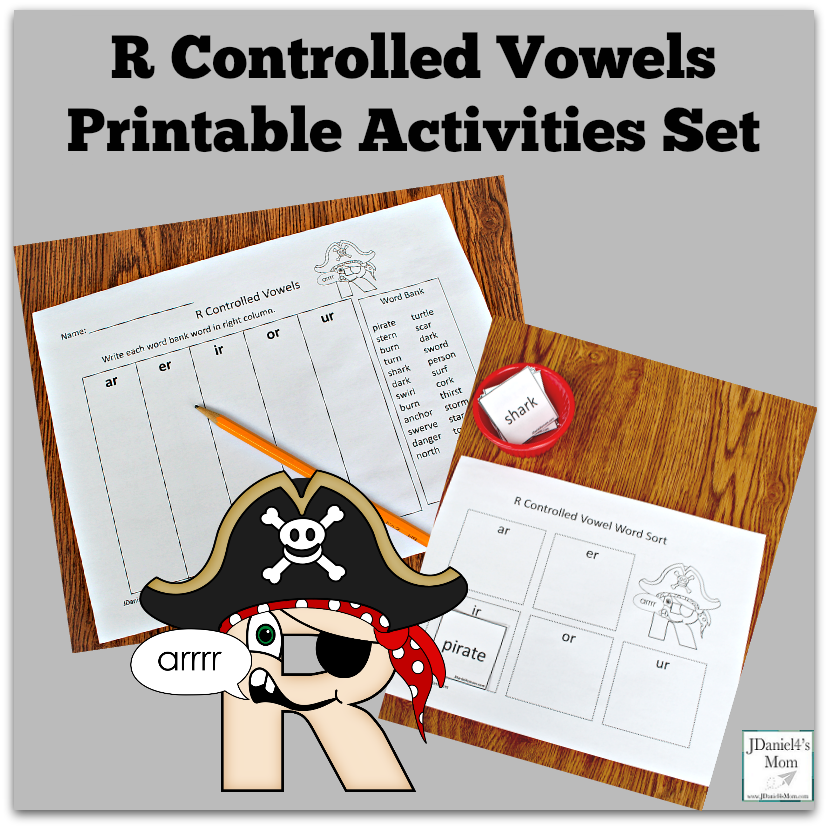
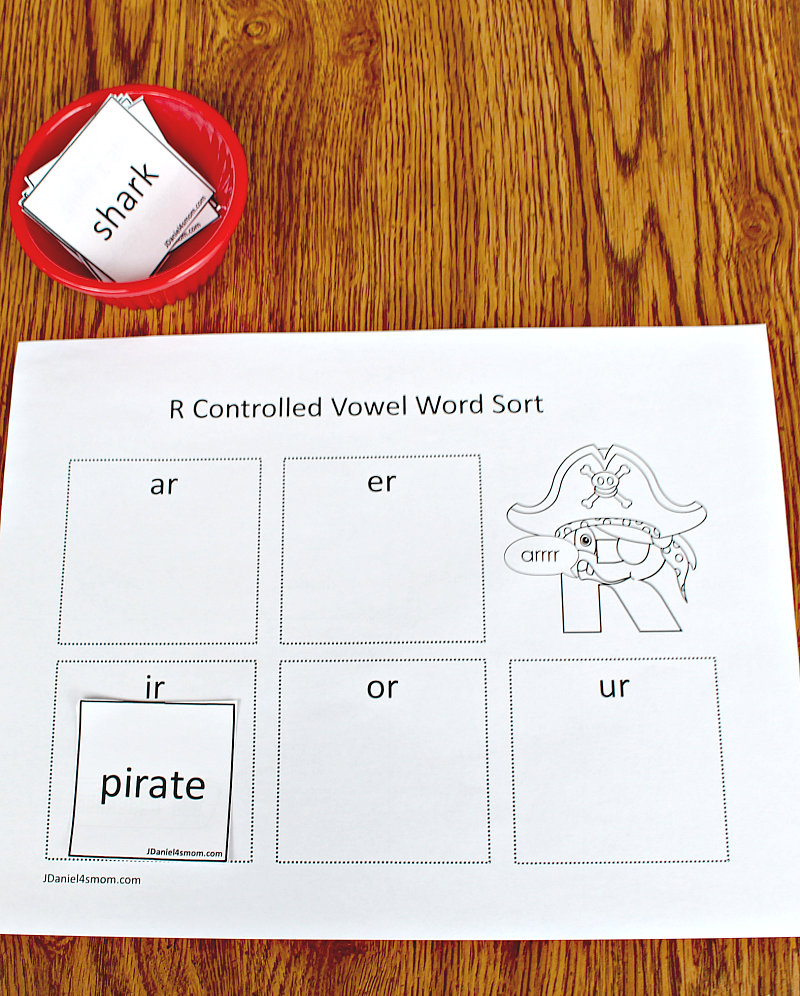
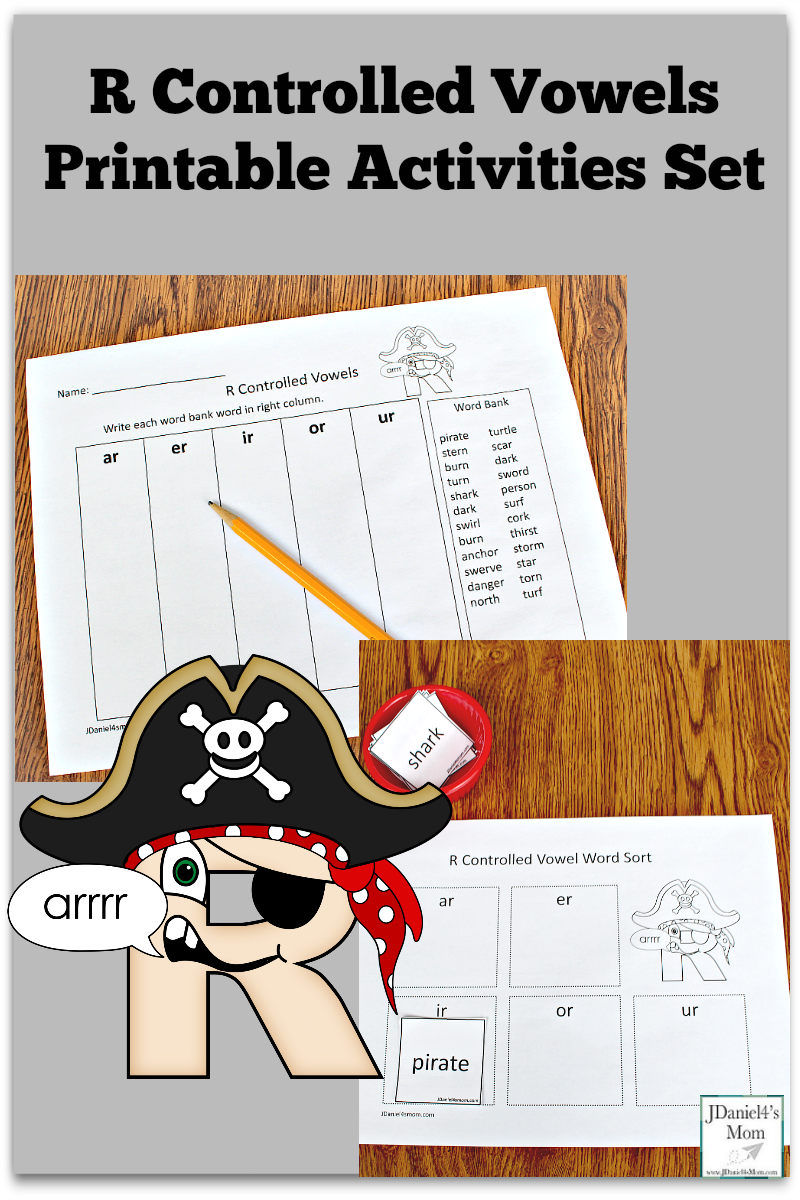
R Controlled vowels can be hard for students to say. Many don’t master sounds that the controlled vowels make until the end of second grade. Children with speech issues made need to keep working on them even longer. My son has had trouble with them for a long time. It is for that reason I decided to start pirate printables week with a set of activities focused on r controlled vowels. Another reason is that pirates love to say, “Arrr!”
Getting Started with the R Controlled Vowels Printable Set
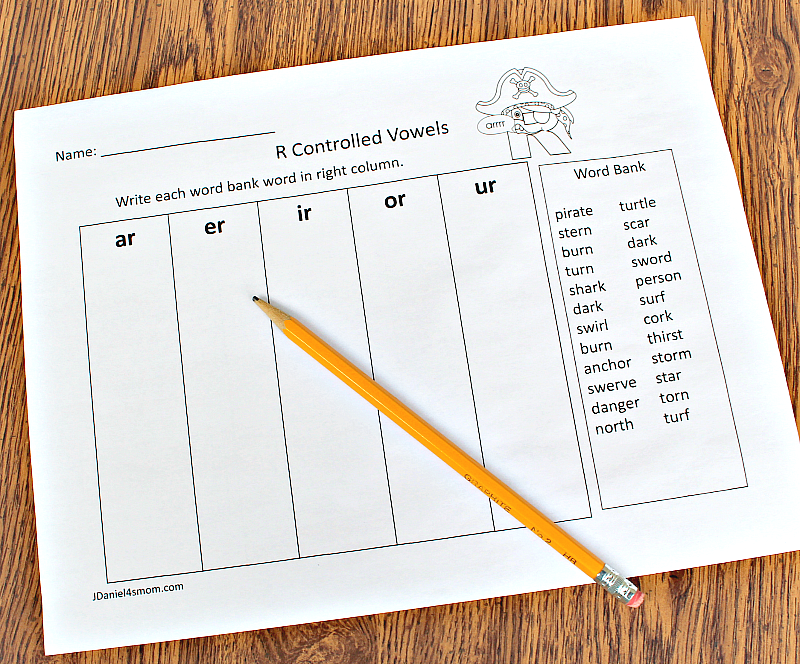
Before you get started you will need to print out the R Controlled Vowels Word Sort Activities. You will only need a pencil to complete the first activity. The second activity has two pages of words filled r controlled vowels that will need to be cut out.
Word Sort Column Page
The first worksheet contains five columns and a word bank. Each of the columns features one of the five major vowels along with the letter r. Your children will need to decide which of the columns each of the words in the word bank needs to go into.
Since this printable is to help children work on r controlled vowels, they should be encouraged to say each word as they write it in the column. When they are finished, you may want them to say each r controlled vowel sound and then each of the words on their list.
Words Sort Card Activity
The second activity has a work mat and cards with words that have r-controlled vowels in them. Your children will need to read each word card. Then they will need to place the word in the box on the work mat that features that vowel sound.
Just as with the first activity your children should be encouraged to read each of the words as they place it in the box. Then they should read each of the words in each pile.
If you are looking for some more reading printables, here are some more you will like:
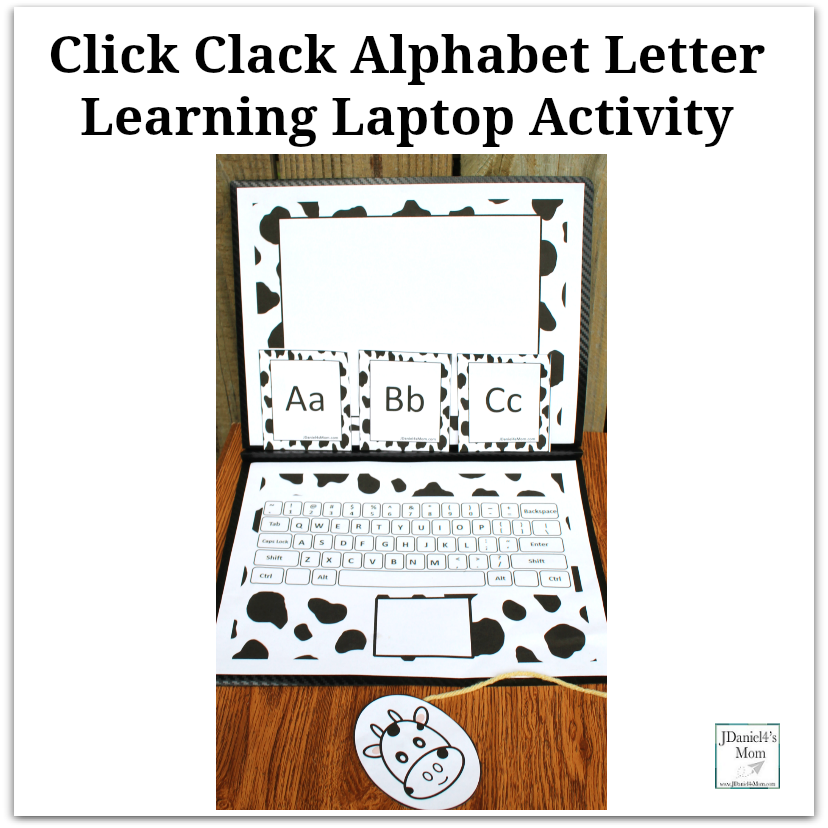
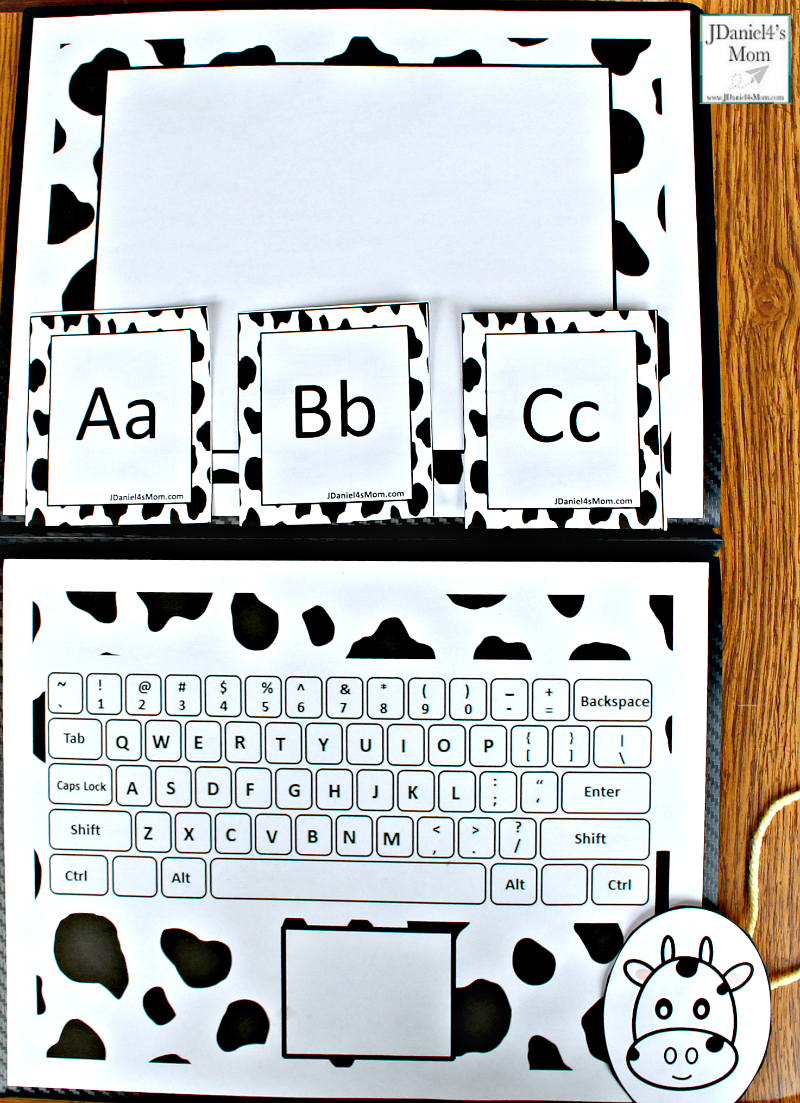
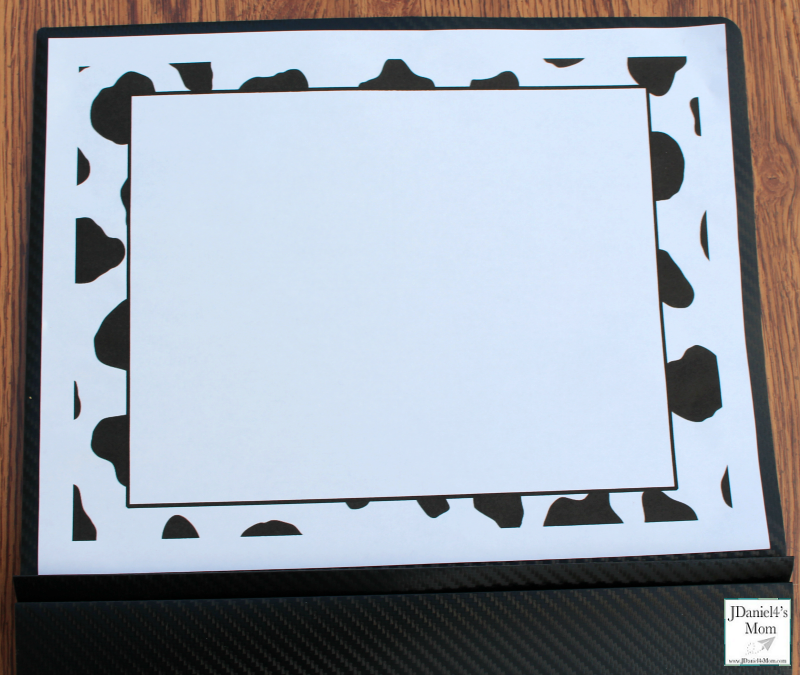
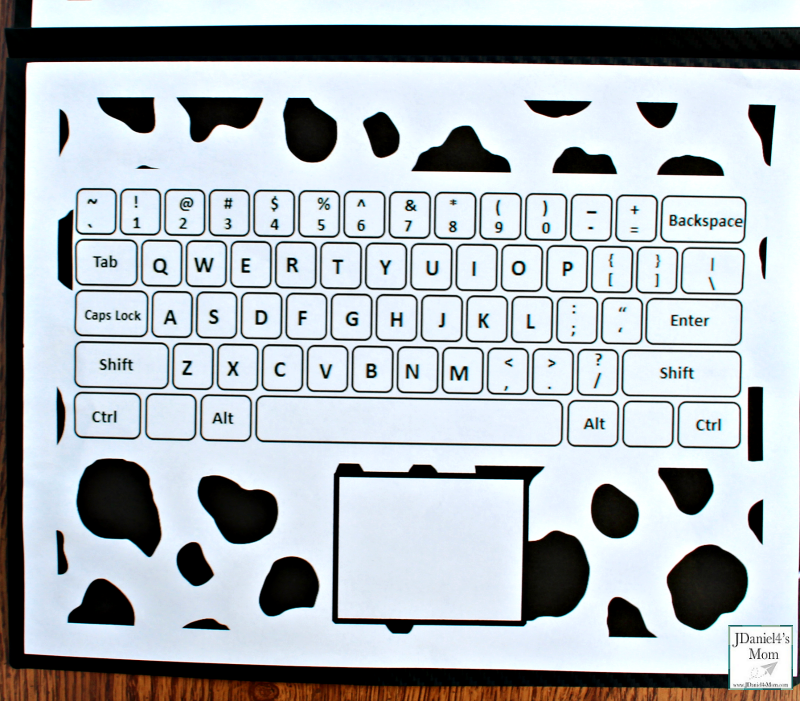
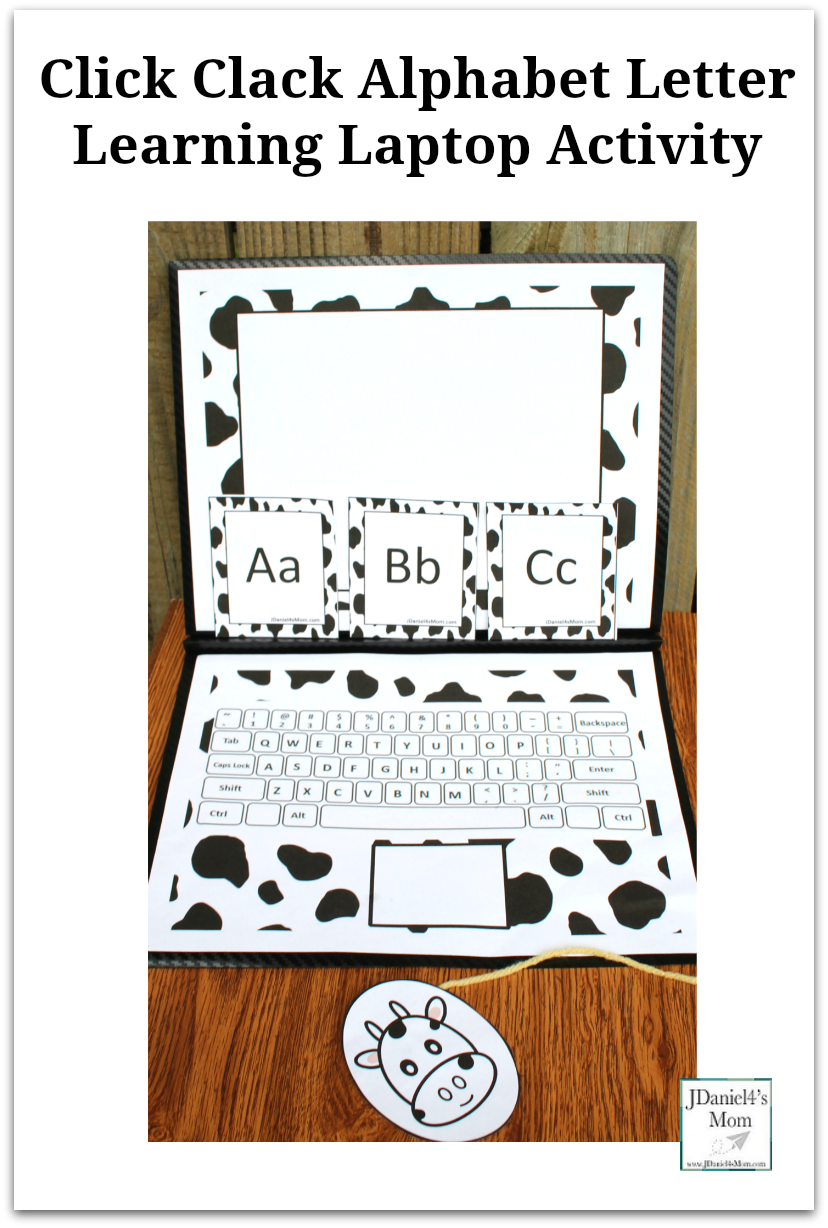
While the cows in the book Click, Clack, Moo Cows That Type use a typewriter. Your children might like exploring their alphabet letters using a laptop computer. Well, a paper folder laptop computer. I bet the cows would have liked to have had a laptop to type on too especially if they had a cow-themed mouse to work with. Below you find the alphabet printable used to make this fun laptop. The letters for the activity are also there.
This week the Virtual Book Club is exploring the book Click, Clack, Moo Cows That Type. After I share this fun alphabet letters kids will love learning activity, I will share with you the activities created by the other book club members. You are going to love all of them!
Alphabet Letters Kids Will Love Activity
Putting the Alphabet Letter Learning Activity Together
You will need to cut out the mice and each of the alphabet letters before you start putting the activity together. Then it will take less than five minutes to construct several alphabet letter learning laptop activities together.
First, you will need to lay the outside of the laptop facing up and open. It needs to be laying vertically on the table.
Then you will work on the mouse. The mouse will need to have one end of a 12-inch length of yarn taped to its underside. The other end of the yarn will need to be taped to the lower right-hand corner of the folder.
The keyboard will now be glued to the bottom section of the folder.
You can store the alphabet letters inside the folder in one of the pockets.
Learning with the Laptop
Your children will need to take the alphabet letters out of the pocket in the folder.
Then they will need to lean their laptop against a wall or lay it flat on the table.
Next, they will try to find the letter on each of the cards on the laptop. When they find that letter they can tap on it with their finger,
Here are the wonderful farm activities from the other Virtual Book Club members:


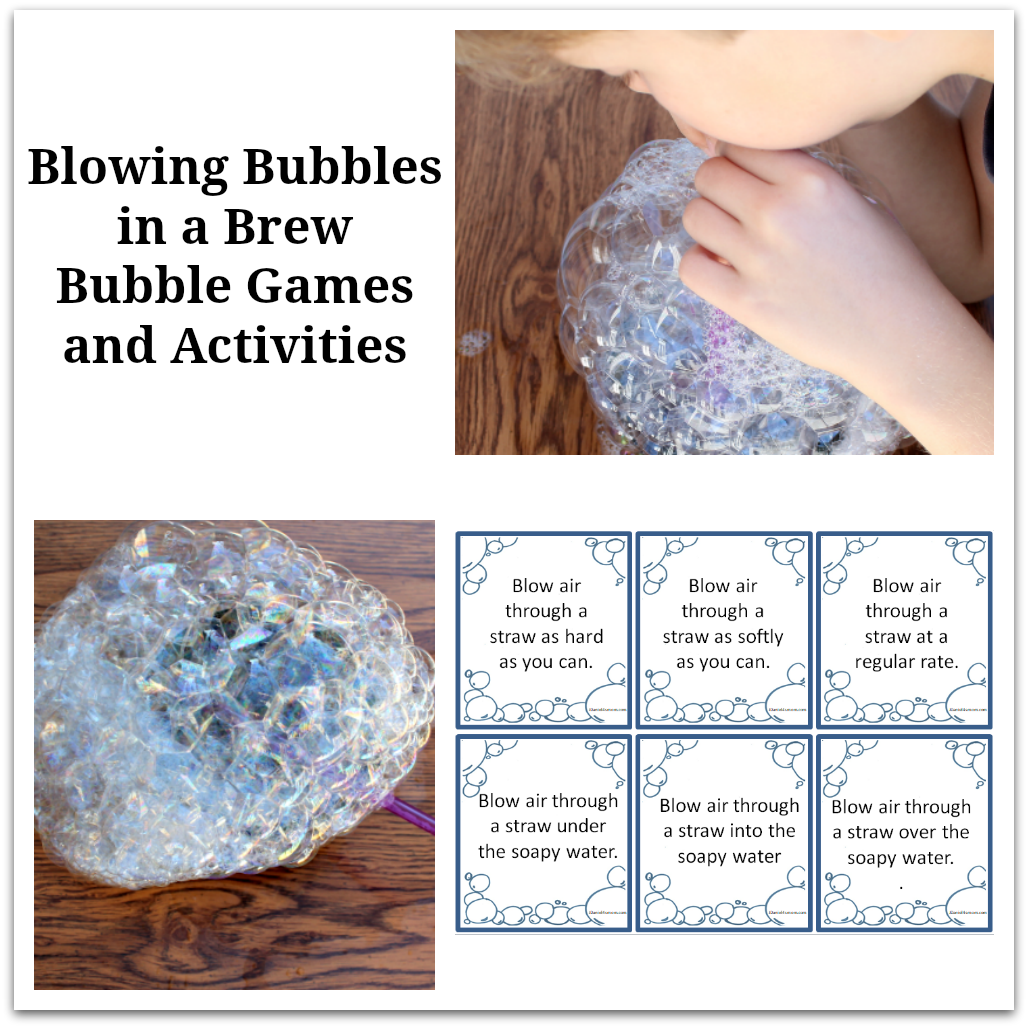 The witch in the story Room on the Broom created a wonderful new broom out with a mixture of things added to her cauldron. Your children will have fun creating bubble creations and playing bubble games using a free set of creation cards, water, soap bubble, and straws.